Easy Angel Crafts: Drinking Straw Angel
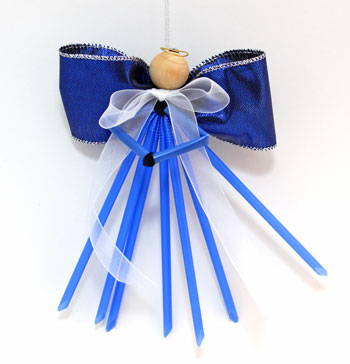
This Drinking Straw Angel ornament is simple and inexpensive using plastic straws, ribbon, yarn, chenille wire, jewelry wire and a wooden bead.
Let's look at the materials and the steps for how to make the straw angel:
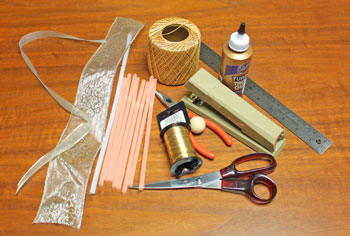
Easy Angel Crafts: Straw Angel Materials and Tools:
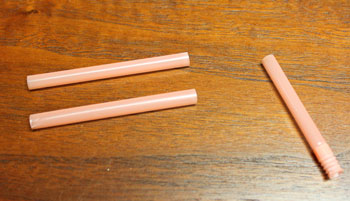
Drinking straws - eight 8-inch plastic flexible
Wired ribbon - 16 inches of 2 1/2 to 3-inch wide
Soft ribbon - 20 inches of 5/8 to 1-inch wide
Chenille wire - 12 inches long
Jewelry wire 20 gauge (can substitute chenille wire)
Wooden bead 25 mm
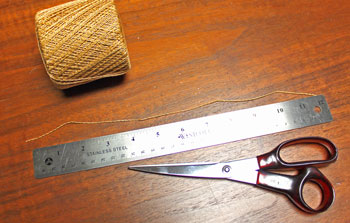
Yarn
Glue
Stapler
Ruler
Needle nose pliers
Scissors
Wired ribbon - 16 inches of 2 1/2 to 3-inch wide
Soft ribbon - 20 inches of 5/8 to 1-inch wide
Chenille wire - 12 inches long
Jewelry wire 20 gauge (can substitute chenille wire)
Wooden bead 25 mm
Yarn
Glue
Stapler
Ruler
Needle nose pliers
Scissors
The Steps for How to Make the Easy Angel Crafts: Straw Angel:
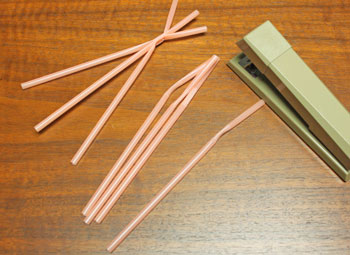
Pull seven straws to extend the flexible area.
Flatten each straw across the flexible area.
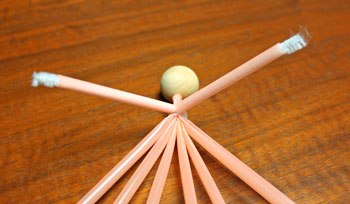
Begin stapling the straws together. I stapled the first three then added one at a time on either side.
Flatten each straw across the flexible area.
Begin stapling the straws together. I stapled the first three then added one at a time on either side.
Use the needle nose pliers to flatten the ends of the staples.
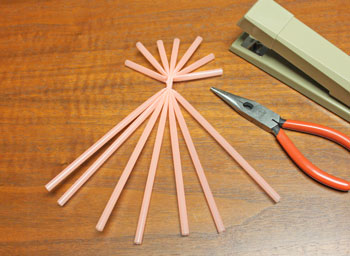
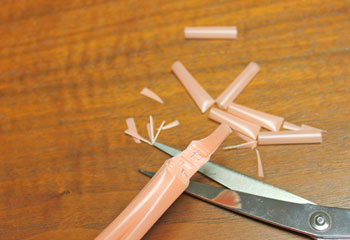
Trim off the top of the straws at 1/2-inch above the flexible area.
Next, trim the sides of the straws above the flexible area.
Next, trim the sides of the straws above the flexible area.
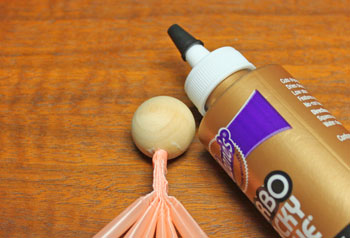
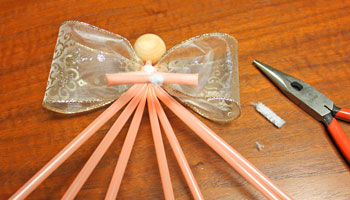
Add glue to the trimmed edges of the straws and insert the ends into the wooden bead.
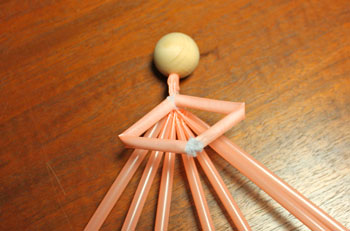
Cut the 12-inch chenille wire into two pieces, one 7 1/2 inches and one 4 1/2 inches.
Wrap the 7 1/2-inch chenille wire around the straws at the staples.
Connect the chenille wires together with one twist.
Connect the chenille wires together with one twist.
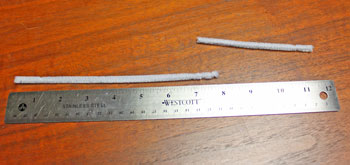
Cut the eighth straw just below the flexible area.
Next, cut the longer piece in half to form the arms.
Next, cut the longer piece in half to form the arms.
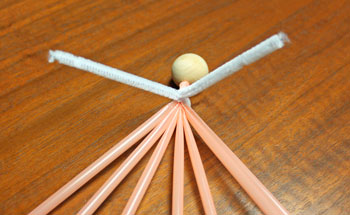
Push the two pieces of straw over the two ends of the chenille wire.
Bend the straw-covered chenille wires in half and join the ends in a simple bend to form the hands.
Push the cut ends of the chenille wire into the ends of each straw.
Push the cut ends of the chenille wire into the ends of each straw.
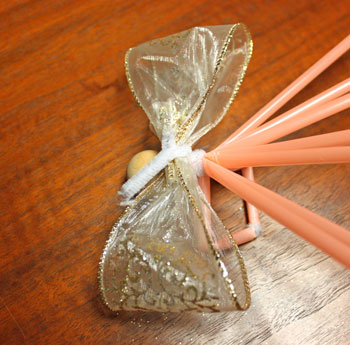
Fold the wide ribbon into a circle overlapping the ends of the ribbon.
Gently fold the circle with the overlapped ends on one side.
Wrap second piece of chenille wire around the stapled area of the straws and twist the wire ends together.
Wrap the ends around the middle of the ribbon and twist the ends to hold the ribbon wings.
Gently fold the circle with the overlapped ends on one side.
Wrap second piece of chenille wire around the stapled area of the straws and twist the wire ends together.
Wrap the ends around the middle of the ribbon and twist the ends to hold the ribbon wings.
Cut the excess chenille wire ends.
Use the pliers to flatten and hide the ends of the wire.
Use the pliers to flatten and hide the ends of the wire.
Wrap the second, narrow ribbon around the angel's neck and form a bow.

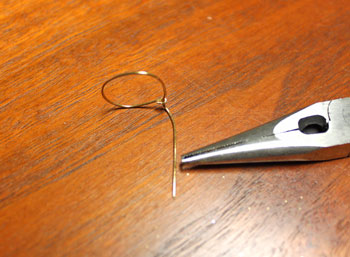
Cut a 4-inch piece of wire for the halo.

Form a 1-inch circle in the wire and crimp the end of the wire to hold the circle in place.
Bend the long end of the wire perpendicular to the circle.
Bend the long end of the wire perpendicular to the circle.
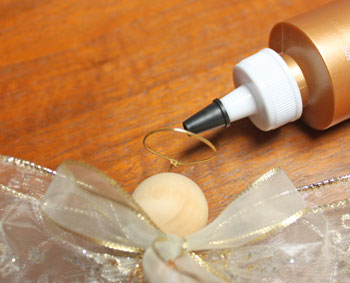
Add glue to the wire and insert the end into the top of the wooden bead.
Cut a 12-inch piece of yarn.
Wrap the yarn behind the ribbon wings and pull the ends even.
Tie a knot into the ends to complete the loop.
Tie a knot into the ends to complete the loop.

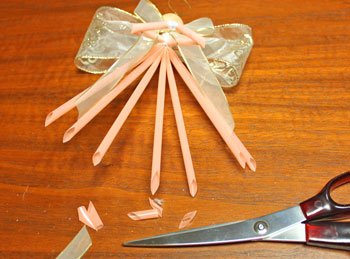
Cut the ends of the straws at an angle.
The center straw should be the longest and each adjacent straw on either side should be slightly shorter.
Trim the ends of the ribbon bow at an angle.
The center straw should be the longest and each adjacent straw on either side should be slightly shorter.
Trim the ends of the ribbon bow at an angle.
The fun little Drinking Straw Angel is finished and ready to display.
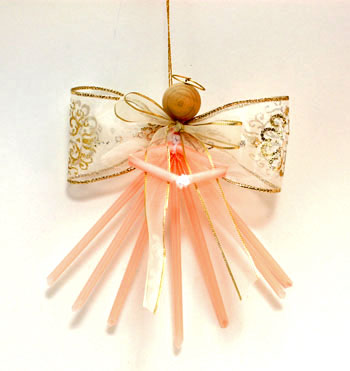
Just a few drinking straws form the basis of this cute little angel.
If you want, you can add a face with an ink pen, paints or with cosmetics.
Have fun!
The Easy Angel Crafts Drinking Straw Angel uses simple and inexpensive materials and tools for the young and young at heart to make one or many of these little decorations.
If you want, you can add a face with an ink pen, paints or with cosmetics.
Have fun!
The Easy Angel Crafts Drinking Straw Angel uses simple and inexpensive materials and tools for the young and young at heart to make one or many of these little decorations.


funEZcrafts
Welcome
Come on in and stay awhile...
funEZcrafts
Welcome
Come on in and stay awhile...