Easy Paper Crafts: Paper Intersections Flower
The Paper Intersections Flower project uses one piece of colorful paper along with scissors, a stapler and some glue to become a fun decoration.
Just look at how colorful the flower can be:
Just look at how colorful the flower can be:

Take a look at the simple steps below for how to make this fun flower.
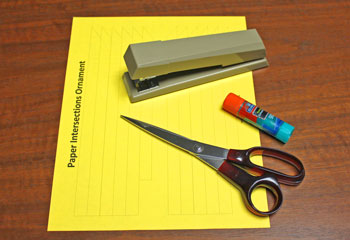
Easy Paper Crafts: Paper Intersections Flower Materials and Tools:
Paper (I used 25-pound Astro Brights)
Scissors
Stapler
Glue
Paper Intersections Flower Pattern
Scissors
Stapler
Glue
Paper Intersections Flower Pattern
The Steps for How to Make the Easy Paper Crafts: Paper Intersections Flower:
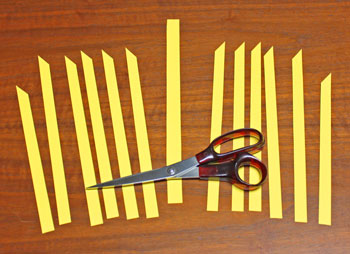
Print the Paper Intersections Flower Pattern on the paper color of your choice.
Though I haven't tried it, this could be fun with multiple colors or even white paper colored with crayons or pencils.
Cut around each of the printed shapes and the long strip between the two sections of shapes.
Keep the long middle shape and the two shorter shapes separate.
Though I haven't tried it, this could be fun with multiple colors or even white paper colored with crayons or pencils.
Cut around each of the printed shapes and the long strip between the two sections of shapes.
Keep the long middle shape and the two shorter shapes separate.
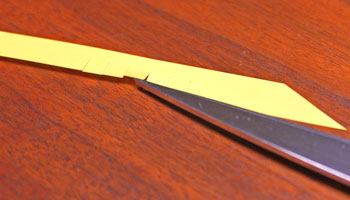
Cut along the dotted lines on each of the strips.
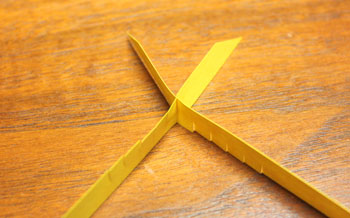
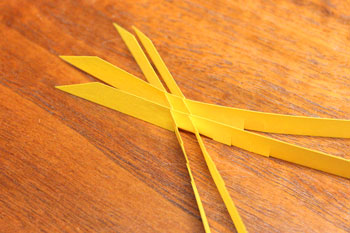
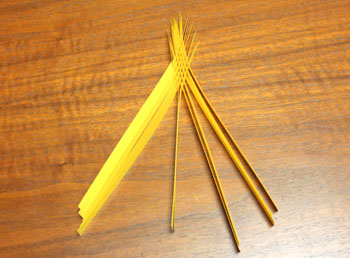
Take one of the long strips from the left section and one from the right.
Join them by crossing them at the cut dotted lines nearest the pointed end.
Join them by crossing them at the cut dotted lines nearest the pointed end.
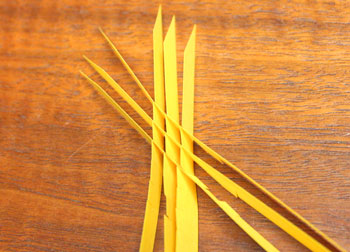
Pull the second set of long strips - one from the left and one from the right sections.
Making sure the angled points face the same way, join the strips to the first two by intersecting the next set of dotted lines.
Making sure the angled points face the same way, join the strips to the first two by intersecting the next set of dotted lines.
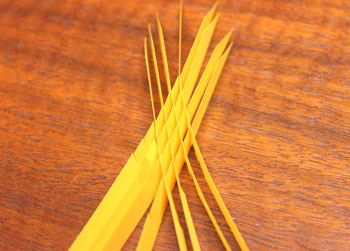
Add the third set of angled strips making sure the points face the same direction as the first two sets.
Add the fourth set of strips.
As you add more strips, getting the cuts along the dotted lines to match and intersect takes a bit more time.
As you add more strips, getting the cuts along the dotted lines to match and intersect takes a bit more time.
Add the fifth set of strips.
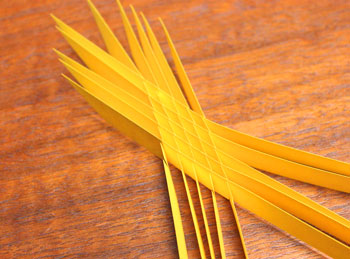
The two shorter strips are the last to be added.
Weave them into the first strips in the same way making sure the angled points are in the same direction.
Weave them into the first strips in the same way making sure the angled points are in the same direction.
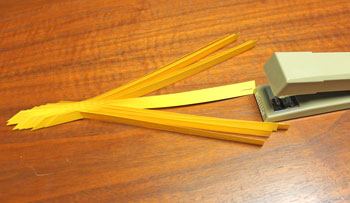
The stem ends of the shorter strips will be in the middle after they are added.
Pull their ends even and staple them together with the staple parallel to the strips.
Pull their ends even and staple them together with the staple parallel to the strips.
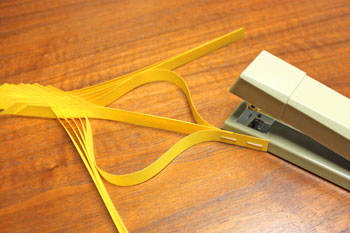
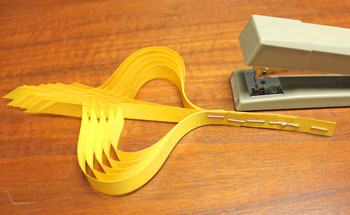
Pull the next adjacent strip from each side of the stapled strips.
Keep their ends even with each other and roughly 1-inch above the ends of the first two stapled strips.
Staple the ends to the first strips.
Keep their ends even with each other and roughly 1-inch above the ends of the first two stapled strips.
Staple the ends to the first strips.
Pull the next adjacent strip from each side.
Place their ends roughly 3/8-inch from the ends of the previous strips and staple.
Place their ends roughly 3/8-inch from the ends of the previous strips and staple.
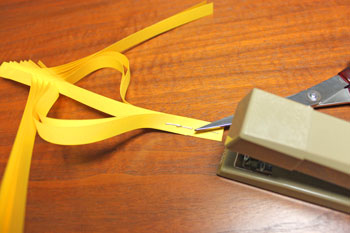
Continue pulling adjacent strips and moving them 3/8-inch above the previous then staple until all the strips are stapled.
Note: Experiment with stapling the ends of the strips at different distances to yield different designs.
Note: Experiment with stapling the ends of the strips at different distances to yield different designs.
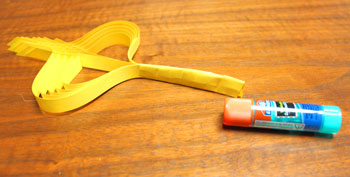
Use the long middle shape to wrap the "stem" of the flower.
Begin wrapping at the uppermost staple and continue until the end of the strips.
Glue the end of the strip to finish the wrapping.
Begin wrapping at the uppermost staple and continue until the end of the strips.
Glue the end of the strip to finish the wrapping.
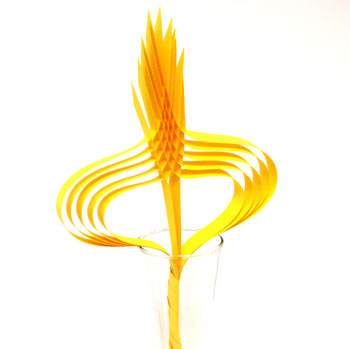
The Paper Intersections Flower is finished and ready to display.
Place it in a bud vase or even hang it in a window.
Place it in a bud vase or even hang it in a window.
Here are several of the Paper Intersections Flowers in bright colors.
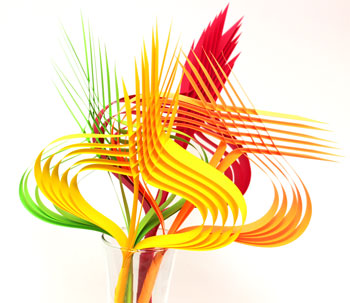
This project uses just a few tools to become a bright and cheerful decoration.
Have fun!
The Paper Intersections Flower project can be fun for anyone and could even be the basis for a fun party garland.
Have fun!
The Paper Intersections Flower project can be fun for anyone and could even be the basis for a fun party garland.


funEZcrafts
Welcome
Come on in and stay awhile...
funEZcrafts
Welcome
Come on in and stay awhile...