Easy Angel Crafts: Felt Circles Angel
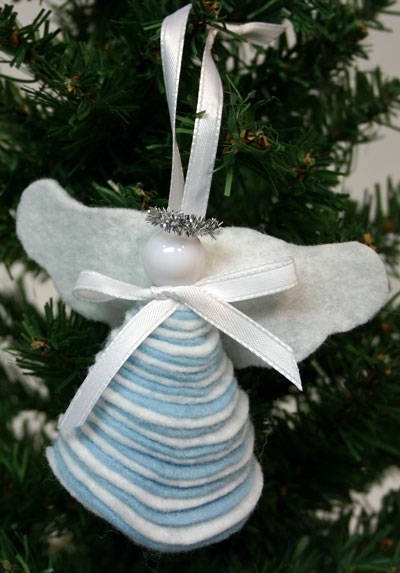
This pretty Easy Angel Crafts Felt Circles Angel is an easy craft made with circles of felt, a chenille wire, some ribbon and a bead or wooden doll's head.
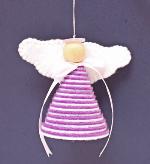
Here's a recent version made with stiff felt using Make-the-Cut software and a cutting machine (click on the thumbnail to see more info):
Let's look at the materials and the steps for how to make this soft version of the felt circles angel:
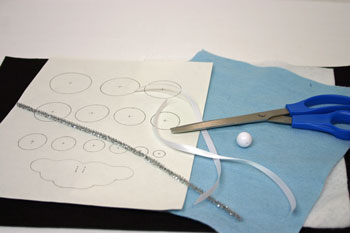
Easy Angel Crafts: Felt Circles Angel Materials and Tools:
Craft felt - two pieces (rough size: 9 inches by 12 inches) in pale blue and white or the colors of your choice
Ribbon - two pieces 1/8 to 1/4 inch wide, each 10 inches long
Bead or wooden doll's head = 1/2 inch diameter
Chenille wire in silver or gold, 6 inches long
Scissors
Ruler (optional - for measuring the ribbon and chenille wire)
Wire cutters (optional - chenille wire easily breaks)
Felt Circles Angel pattern (click here for the Easy Angel Crafts Felt Circles Angel pattern)
The Steps for How to Make the Easy Angel Crafts: Felt Circles Angel:
Print a copy of the Easy Angel Crafts Felt Circles Angel pattern template.
Cut around each of the pattern pieces such that you have 13 circles and one wings pattern.
Cut around each of the pattern pieces such that you have 13 circles and one wings pattern.
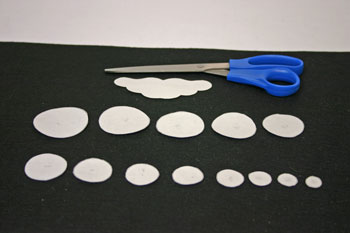
Cut two circles of felt for each circle pattern. One circle from each of the two colors of craft felt.
For the largest circle, cut an additional circle of felt out of the color you want to be dominant (the top color of each pair of circles).
This Easy Angel Crafts Felt Circles Angel's dominant color is white.
Cut one set of wings from the same dominant color.
For the largest circle, cut an additional circle of felt out of the color you want to be dominant (the top color of each pair of circles).
This Easy Angel Crafts Felt Circles Angel's dominant color is white.
Cut one set of wings from the same dominant color.

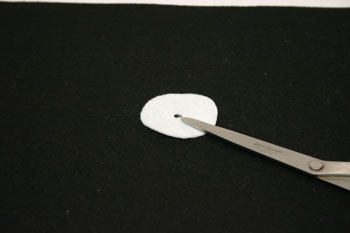
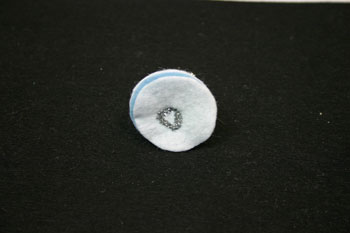
Cut a small slit in the middle of each circle. The pattern pieces show the center of the circles.
The easiest way to find the center is fold the felt circle in half forming a half circle, then in half again to form a quarter circle.
Use your scissors to cut a small slit (1/8 inch to 1/4 inch long) in the center of the circle.
Do this step for every one of the circles.
The easiest way to find the center is fold the felt circle in half forming a half circle, then in half again to form a quarter circle.
Use your scissors to cut a small slit (1/8 inch to 1/4 inch long) in the center of the circle.
Do this step for every one of the circles.
Cut or break the chenille wire into a six inch length.
Some packages of the chenille wires are 12 inches in length which means breaking the wire in half yields the length needed for this angel.
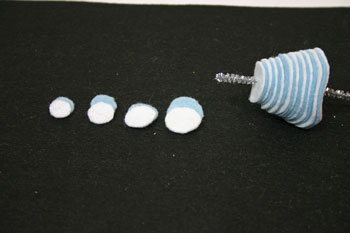
Begin threading the dominant color of the largest circle onto the chenille wire.
Some packages of the chenille wires are 12 inches in length which means breaking the wire in half yields the length needed for this angel.
Begin threading the dominant color of the largest circle onto the chenille wire.
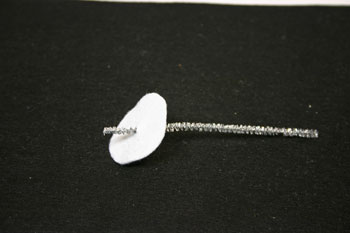
Alternate the two colors for the largest circle and add them to the chenille wire.
In this case, the Easy Angel Crafts Felt Circles Angel's dominant color is white.
The large circles are added to the chenille wire in white - blue - white order.
In this case, the Easy Angel Crafts Felt Circles Angel's dominant color is white.
The large circles are added to the chenille wire in white - blue - white order.
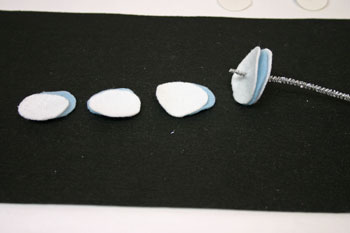
Add the circles in descending size order.
Line up the circles in descending order to make it easier to add them to the chenille wire.
Add the underlying color first then the dominant color. For this angel, blue is added before white.
Line up the circles in descending order to make it easier to add them to the chenille wire.
Add the underlying color first then the dominant color. For this angel, blue is added before white.
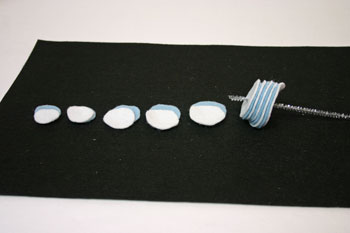
Continue adding the circles to the chenille wire. The final circle should be the dominant color, in this case, white.
After the last circle is added, push the felt down the chenille wire leaving roughly 1 1/2 inches of wire at the bottom
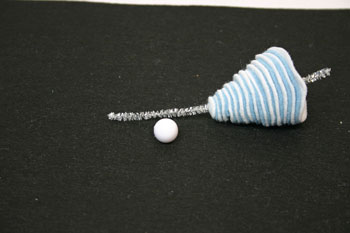
Add the bead to the top of the wire.
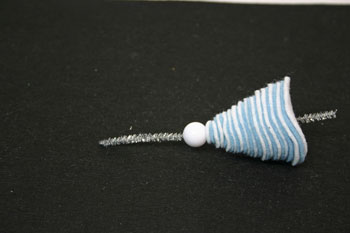
Wrap the wire around the tip of your finger to form a halo.
Push the end of the wire into the top of the bead.
You can also twist the end of the wire back onto itself to complete the small circle for the halo.
Push the end of the wire into the top of the bead.
You can also twist the end of the wire back onto itself to complete the small circle for the halo.
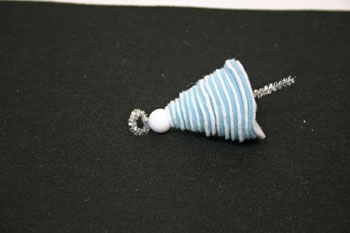
At the bottom, form another circle or triangle with the protruding wire. Insert the end of the wire into the center of the felt circle.
At this point, the base of the angel is complete.
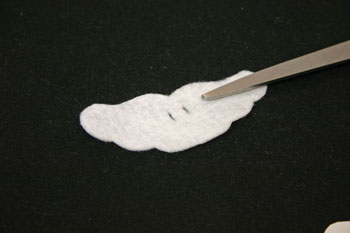
Cut two vertical slits in the upper portion of the felt wings.
The dotted lines on the pattern show where the slits should be cut.
The slits should be slightly longer than the ribbon is wide.
The dotted lines on the pattern show where the slits should be cut.
The slits should be slightly longer than the ribbon is wide.
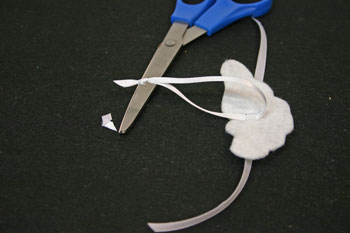
Thread one of the pieces of ribbon through the slits moving from the inside of the wings to the outside then back inside.
This ribbon will be used to attach the wings to the Easy Angel Crafts Felt Circles Angel base.
This ribbon will be used to attach the wings to the Easy Angel Crafts Felt Circles Angel base.
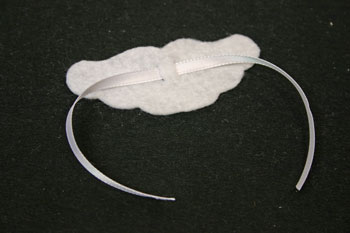
Thread the second piece of ribbon under the first piece of ribbon on the outside of the wings.
Bring the ends together and tie a knot to form a ribbon loop.
Trim the ends of the ribbon.
If you do not want to hang your Easy Angel Crafts Felt Circles Angel, just omit this step.
Bring the ends together and tie a knot to form a ribbon loop.
Trim the ends of the ribbon.
If you do not want to hang your Easy Angel Crafts Felt Circles Angel, just omit this step.
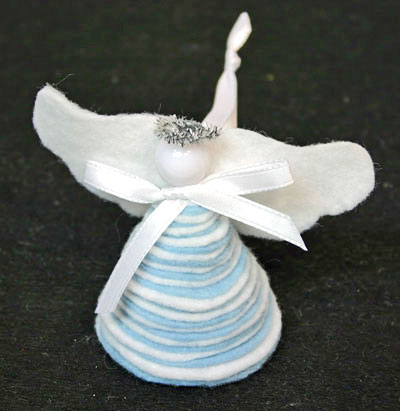
Position the wings behind the bead and bring the ends of the ribbon to the front.
Pull the ribbon taut, but not too tight, underneath the bead.
Tie the ribbon into a bow and trim the ends of the ribbon at an angle.
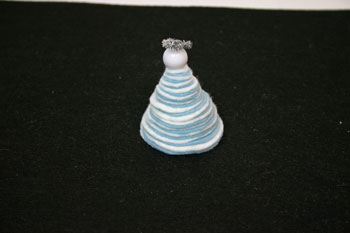
Your Easy Angel Crafts Felt Circles Angel is complete!
Pull the ribbon taut, but not too tight, underneath the bead.
Tie the ribbon into a bow and trim the ends of the ribbon at an angle.
Your Easy Angel Crafts Felt Circles Angel is complete!
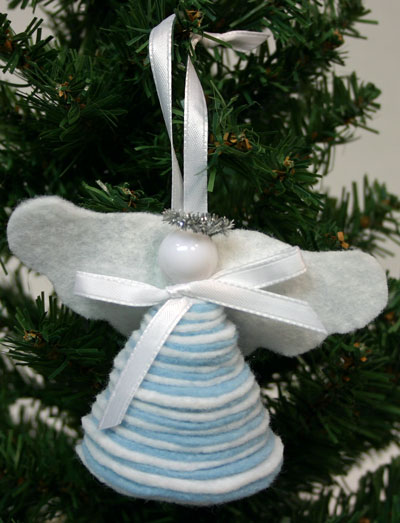
This serene angel hangs from the tree, waiting prettily for people passing by to notice.
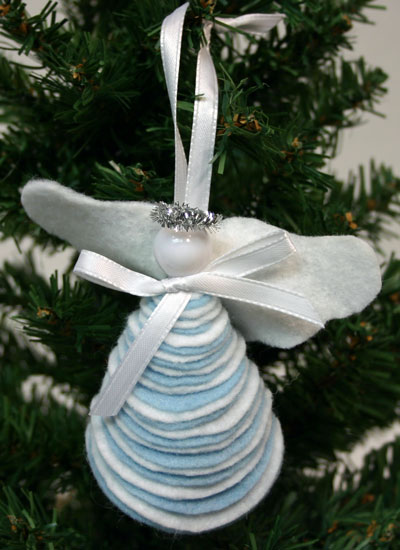
For a slightly different look, the felt circles can be fanned downward to form a more elongated shape.
Inexpensive materials, a few common tools and a little time makes one or many of these simple, yet pretty, angels.
Have fun!
This is a fun project for adults and children with the adults cutting the various shapes while the children construct the angel bases.
Both adults and children can enjoy finishing the Easy Angel Crafts Felt Circles Angels to hang, decorate a table or embellish a gift.
Have fun!
This is a fun project for adults and children with the adults cutting the various shapes while the children construct the angel bases.
Both adults and children can enjoy finishing the Easy Angel Crafts Felt Circles Angels to hang, decorate a table or embellish a gift.


funEZcrafts
Welcome
Come on in and stay awhile...
funEZcrafts
Welcome
Come on in and stay awhile...