Easy Angel Crafts: Handkerchief Angel
This Easy Angel Crafts Handkerchief Angel can be made using a handkerchief or it can be made from a small fabric scrap. (The steps below are very similar to the Easy Angel Crafts Doily Angel.)
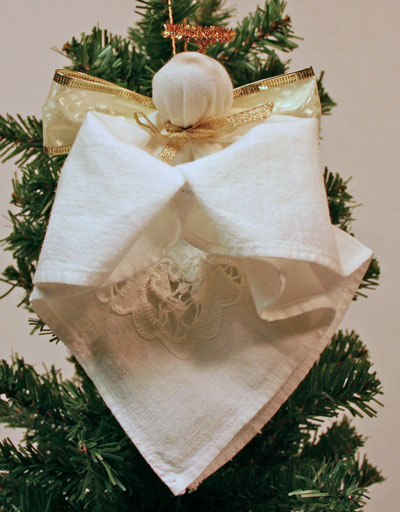
The first Easy Angel Crafts Handkerchief Angel shown below was made using a pretty handkerchief with embroidery and cut-work on one corner.
The first Easy Angel Crafts Handkerchief Angel shown below was made using a pretty handkerchief with embroidery and cut-work on one corner.
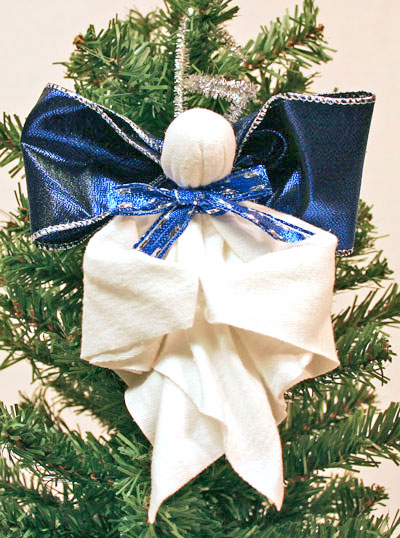
But, this second angel uses a piece of fabric cut from an old white knit t-shirt. The steps are simple and the materials inexpensive.
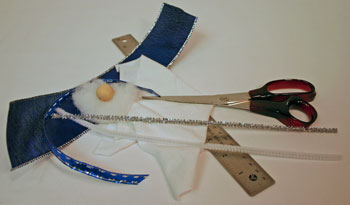
Let's look at the materials and the steps for how to make the handkerchief angel:
Easy Angel Crafts: Handkerchief Angel Materials and Tools:
Handkerchief or fabric 8 or 10 inches square
Chenille wires - two 12 inches long, one white and one silver
Wooden bead or doll's head - 3/4 inch diameter (optionally, you can just use more fiberfill or cotton instead of the doll's head)
Narrow ribbon 8 inches long by 1/4 to 1/2 inch wide
Wide Ribbon 12 inches long by 1 3/4 to 2 inches wide (wired ribbon holds shape better)
Fiberfill or cotton balls - small amount
Ruler
Scissors
The Steps for How to Make the Easy Angel Crafts: Handkerchief Angel:
If not using a finished handkerchief, cut the fabric square.
An eight-inch square makes a smaller, more dainty Easy Angel Crafts Handkerchief Angel.
The ten-inch square angel makes a larger presentation wherever you choose to hang the angel.
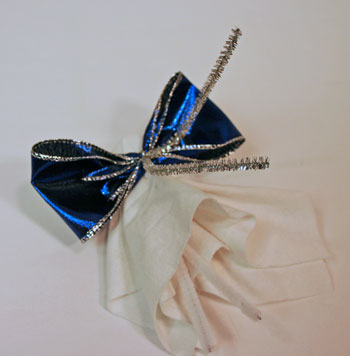
Cut the ribbon, eight inches for the narrow neck ribbon and twelve inches of the wider ribbon for the wings.
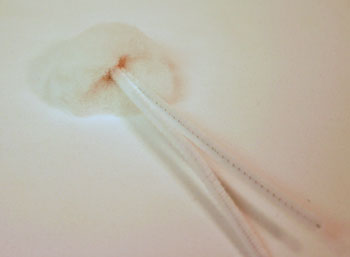
Fold the white chenille wire in half.
Insert the folded end into the wooden doll's head. (If you are not using the doll's head, insert the chenille wire into the ball of fiberfill or cotton.)
An eight-inch square makes a smaller, more dainty Easy Angel Crafts Handkerchief Angel.
The ten-inch square angel makes a larger presentation wherever you choose to hang the angel.
Cut the ribbon, eight inches for the narrow neck ribbon and twelve inches of the wider ribbon for the wings.
Fold the white chenille wire in half.
Insert the folded end into the wooden doll's head. (If you are not using the doll's head, insert the chenille wire into the ball of fiberfill or cotton.)

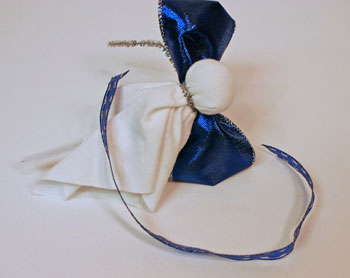
Wrap the fiberfill around the wooden doll's head.
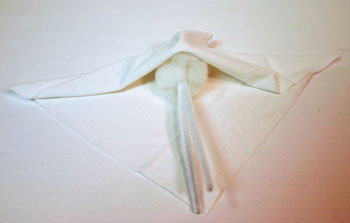
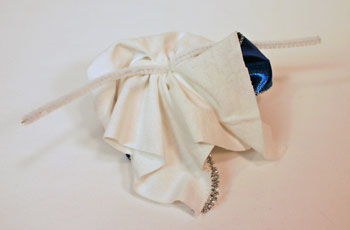
Fold the square in half diagonally.
Insert the doll's head into the middle of the fold.
Insert the doll's head into the middle of the fold.
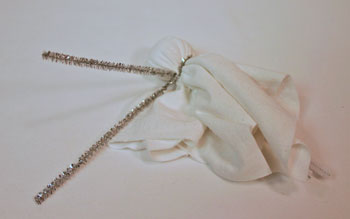
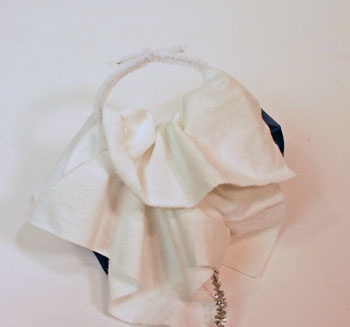
Wrap the silver chenille wire around the fabric just below the wooden ball forming the angel's neck.
Twist the wire ends to secure.
Twist the wire ends to secure.
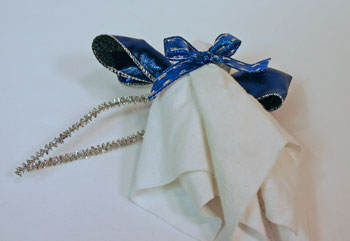
Fold the ribbon with the ends overlapping in the middle of one side.
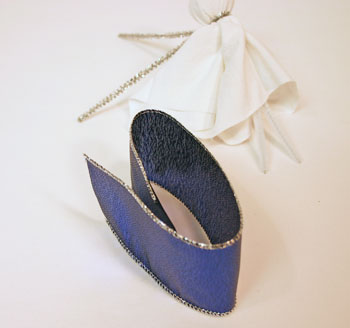
Pinch the middle of the ribbon to begin forming the angel's wings.
Position the ribbon between the wire ends.
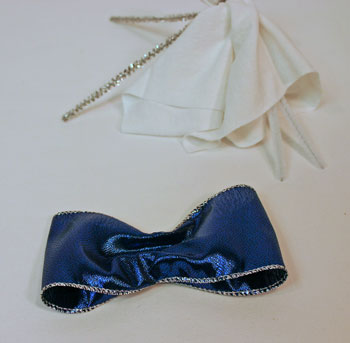
Twist the chenille wire over the ribbon to add the angel's wings.
Twist the chenille wire over the ribbon to add the angel's wings.
Wrap the narrow ribbon around the Easy Angel Crafts Handkerchief Angel's neck over the silver chenille wire.
Tie a bow under the head on the front (the side opposite the wings).
Wrap one end of the silver chenille wire around your finger to form the halo.
Join the end back onto itself to complete the halo's circle.
Make a half circle in the other end of silver chenille wire.
This forms the hanger for the angel.
Join the end back onto itself to complete the halo's circle.
Make a half circle in the other end of silver chenille wire.
This forms the hanger for the angel.
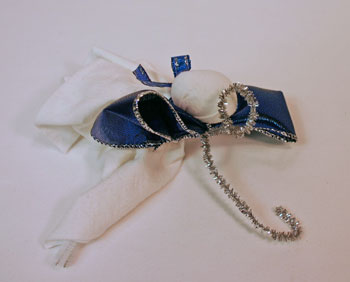
Fold the fabric back to reveal the white chenille wire ends.
Form a circle with the chenille wires.
Join their ends by clasping and bending the wires back on themselves.
Join their ends by clasping and bending the wires back on themselves.
Fold the fabric back over the circle of chenille wire to form the Easy Angel Crafts Handkerchief Angel's arms with clasped hands.
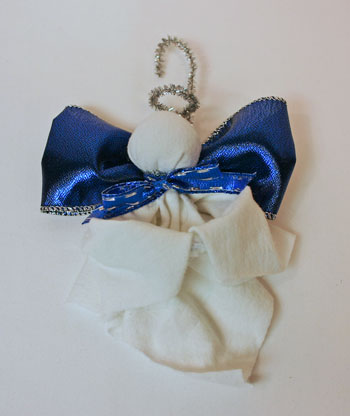
It may have started as a piece of old t-shirt material, but the finished angel looks pretty hanging on the tree.
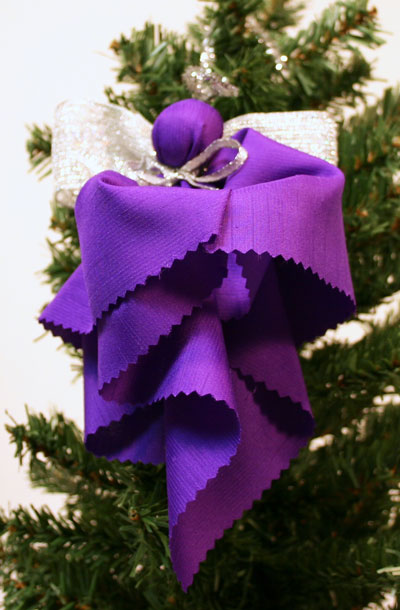
This next Easy Angel Crafts Handkerchief Angel was made with a small scrap of purple fabric and silver neck and wing ribbons.
Rather than hemming the edges, pinking shears were used to cut the edges to prevent the fabric from raveling.
Rather than hemming the edges, pinking shears were used to cut the edges to prevent the fabric from raveling.
Angels, angels everywhere!
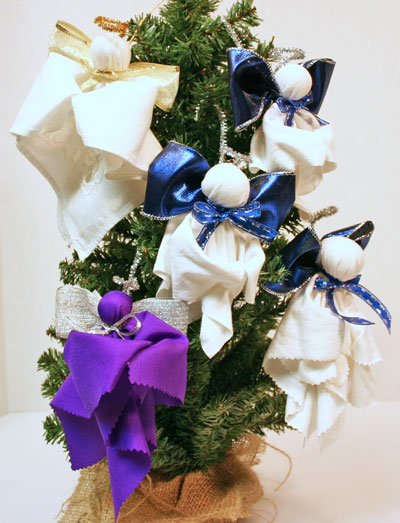
A few materials and simple tools provide an afternoon's fun for children and adults alike.
Have fun!
Whether made with handkerchiefs or with scraps of fabric, these Easy Angel Crafts Handkerchief Angel projects are easy and fun to make.
Have fun!
Whether made with handkerchiefs or with scraps of fabric, these Easy Angel Crafts Handkerchief Angel projects are easy and fun to make.


funEZcrafts
Welcome
Come on in and stay awhile...

funEZcrafts
Welcome
Come on in and stay awhile...