Easy Angel Crafts: Pen-Pencil Cross Stitch Angel
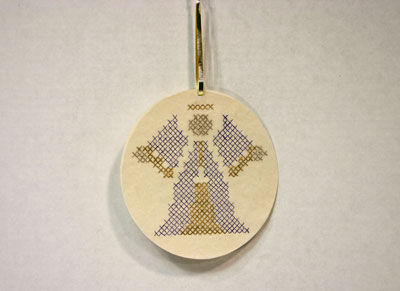
This pretty Easy Angel Crafts Pen-Pencil Cross Stitch Angel can hang in a window or from a mantel.
With just a few simple materials and tools along with a few minutes of time, this angel quickly becomes a decoration or a gift.
With just a few simple materials and tools along with a few minutes of time, this angel quickly becomes a decoration or a gift.
Let's look at the materials and the steps for how to make the simple yet pretty angel:
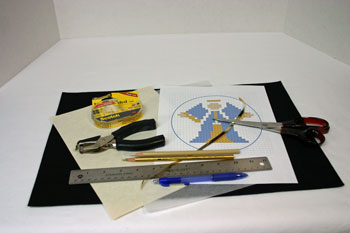
Easy Angel Crafts: Pen-Pencil Cross Stitch Angel Materials and Tools:
Tracing paper or other paper that will allow the pattern to show through
Three colors of ink pens, pencils, paint pens, crayons or any combination of media in colors of your choice (This angel used a blue ink pen, a metallic gold pencil and a French Gray 60% pencil.)
Tape or glue (double sided tape is best but not necessary)
Background paper (paper shown is a cream colored bond)
Ribbon - 1/4 inch by 12 inches
Ruler
Scissors
Hole punch (or just use scissors to cut the hole for the ribbon loop)
Angel cross stitch pattern (click here for the Easy Angel Crafts Pen-Pencil Cross Stitch Angel pattern)
The Steps for How to Make the Easy Angel Crafts: Pen-Pencil Cross Stitch Angel:
Print the Easy Angel Crafts Pen-Pencil Cross Stitch Angel pattern page.
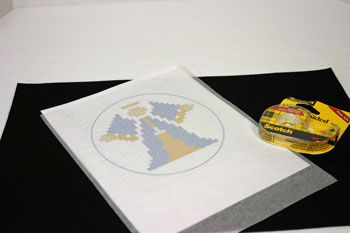
Attach the tracing paper (or paper you choose) to the front of the pattern.
Double-sided tape placed at the top to the left and the right of the blue oval easily holds the two pieces of paper together.
If you don't have double-sided tape, glue or one-sided tape will work just as well to hold the paper in place over the pattern.
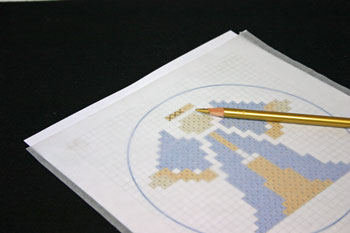
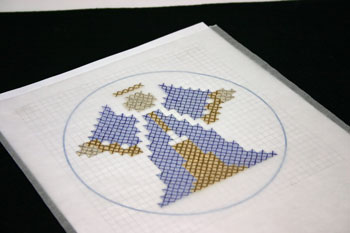
Begin making the crosses or X's with your chosen color of pen or pencil.
Start at the top and work such that your hand will not rub over the completed area and smudge the X's.
Start at the top and work such that your hand will not rub over the completed area and smudge the X's.
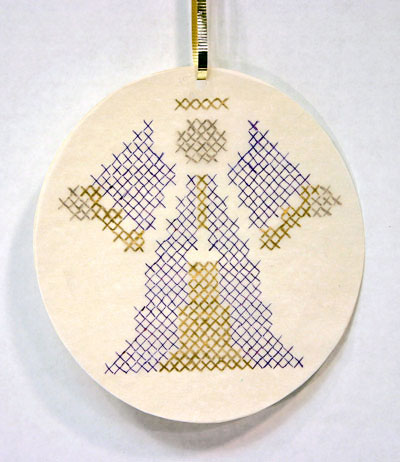
Fill in the colors by applying your three colors consistently to the three colors on the pattern.
For example, if you want the robe to be red, make sure all of the blue colored areas receive red X's on your angel.
Similarly, if you want the halo and robe accents to be silver, place silver X's over the gold colored areas.
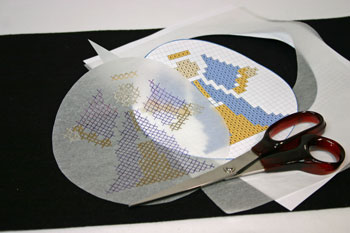
Verify all of the X's are correctly filled into the appropriate squares by sliding a blank piece of paper (can use the background paper) behind the finished angel.
Remove the paper from behind the Easy Angel Crafts Pen-Pencil Cross Stitch Angel.
For example, if you want the robe to be red, make sure all of the blue colored areas receive red X's on your angel.
Similarly, if you want the halo and robe accents to be silver, place silver X's over the gold colored areas.
Verify all of the X's are correctly filled into the appropriate squares by sliding a blank piece of paper (can use the background paper) behind the finished angel.
Remove the paper from behind the Easy Angel Crafts Pen-Pencil Cross Stitch Angel.
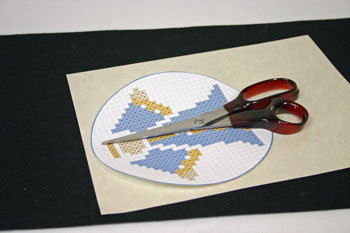
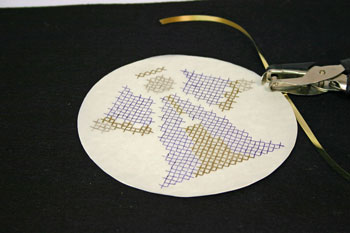
Using scissors, cut out the finished Easy Angel Crafts Pen-Pencil Cross Stitch Angel from the pattern using the blue oval as a guide.
Place the cut-out pattern on the background paper.
Cut the background paper around the pattern oval paper.
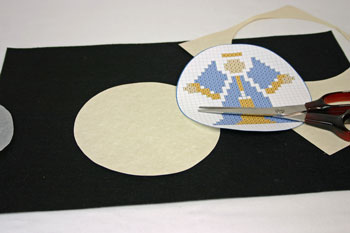
Match the finished Easy Angel Crafts Pen-Pencil Cross Stitch Angel oval to the background oval.
It's easier to tape the finished angel oval to the background paper then cut around the oval, but you run the risk of smudging the pen and pencil X's on the angel.
It's easier to tape the finished angel oval to the background paper then cut around the oval, but you run the risk of smudging the pen and pencil X's on the angel.

Tape the finished Easy Angel Crafts Pen-Pencil Cross Stitch Angel to the background paper.
Double-sided tape works best, but one-sided tape or glue works too.
Double-sided tape works best, but one-sided tape or glue works too.
With the hole punch (or scissors), make a hole just above the middle X in the halo. Insert the ribbon through the hole and tie a knot in the ends to make the hanging loop.
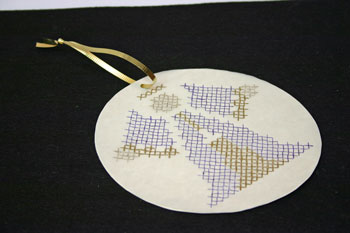
The pretty Easy Angel Crafts Pen-Pencil Cross Stitch Angel is finished and ready to hang.
Using pen and pencil, the cross stitching is much faster than with a needle and thread.
But, if you enjoy doing needle and thread cross stitching, this pattern quickly translates into counted cross stitch.
Have fun!
Making this Easy Angel Crafts Pen-Pencil Cross Stitch Angel easily provides inexpensive enjoyment for children and adults alike.
But, if you enjoy doing needle and thread cross stitching, this pattern quickly translates into counted cross stitch.
Have fun!
Making this Easy Angel Crafts Pen-Pencil Cross Stitch Angel easily provides inexpensive enjoyment for children and adults alike.


funEZcrafts
Welcome
Come on in and stay awhile...

funEZcrafts
Welcome
Come on in and stay awhile...