Easy Christmas Crafts: Woven Ribbon Christmas Tree Door Hanger
Our Easy Christmas Crafts Woven Ribbon Christmas Tree Door Hanger is fun, simple and inexpensive. With a piece of craft felt, some ribbon and simple stitches you can easily make this decorative door hanger.
This pretty padded Christmas tree can hang on a door knob, a kitchen cabinet knob, a drawer pull, an office door along with many other places. In addition, this pretty tree can be added to dining chairs for a dinner party or placed among the decorations on a buffet.
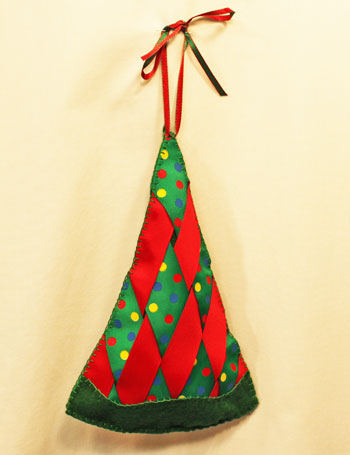
Take a look at the finished Easy Christmas Crafts Woven Ribbon Christmas Tree Door Hanger.
This pretty padded Christmas tree can hang on a door knob, a kitchen cabinet knob, a drawer pull, an office door along with many other places. In addition, this pretty tree can be added to dining chairs for a dinner party or placed among the decorations on a buffet.
Take a look at the finished Easy Christmas Crafts Woven Ribbon Christmas Tree Door Hanger.
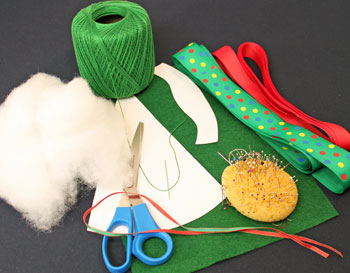
The woven ribbon Christmas tree door hanger requires just a few inexpensive materials. By using different colors and designs of ribbons and colors of felt, you can make a few or many unique versions of this simple door hanger.
Easy Christmas Crafts: Woven Ribbon Christmas Tree Door Hanger Materials and Tools:
Craft felt, 9 x 12 inches in your choice of color (I used pirate green.)
Ribbon - two colors of 1 to 1 1/2 inches wide (The length varies based on the width, but unless you use less than 1-inch wide ribbon, the required length will be between 18 and 36 inches for each. The two ribbons do not have to be the same width.)
Ribbon for the hanger - 1/4 inch wide by 24 inches long
Polyester fiberfill
Yarn (I used #10 crochet yarn.)
Needle
Ruler
Scissors
Pins
Easy Christmas Crafts Woven Ribbon Christmas Tree Door Hanger pattern
Take a look at the simple materials and tools shown here.
I used grosgrain ribbon for this version. One ribbon is red and 1-inch wide. The other ribbon is green with bright multi-colored polka dots at 1 1/2-inches wide. The ribbon for the hanger is 1/4-inch wide with green on one side and red on the other.
I used grosgrain ribbon for this version. One ribbon is red and 1-inch wide. The other ribbon is green with bright multi-colored polka dots at 1 1/2-inches wide. The ribbon for the hanger is 1/4-inch wide with green on one side and red on the other.
The Steps for How to Make the Easy Christmas Crafts: Woven Ribbon Christmas Tree Door Hanger:
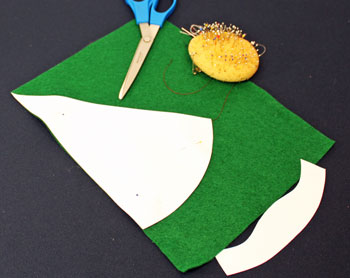
Print the Easy Christmas Crafts Woven Ribbon Christmas Tree Door Hanger pattern and cut out the shapes. I included a star with the pattern though I did not use it for these examples.
Position the tree shape along one edge and near the end. You need two of the tree shapes.
Be careful how you position the pattern such that all of the pieces can be cut from one piece of felt.
With felt, you do not need to worry about placing the pattern on the grain, and you don't need to worry about a right and wrong side.
Though, you do need to pull the sticky label off the felt. You can consider the side opposite the sticky label as the right side.
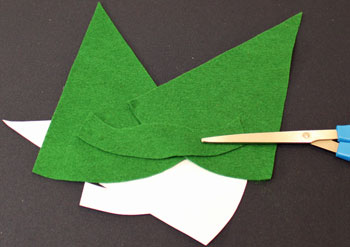
Cut around the first tree shape.
Turn the pattern and position it along the opposite edge.
Fit the small pattern piece in the remaining portion of the felt.
Turn the pattern and position it along the opposite edge.
Fit the small pattern piece in the remaining portion of the felt.
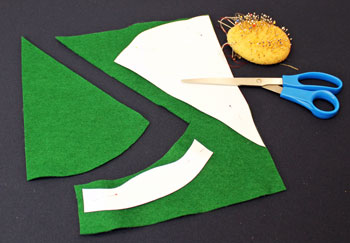
Finish cutting out the felt pieces for the Easy Christmas Crafts Woven Ribbon Christmas Tree Door Hanger.
You should have two tree shapes and a small strip of felt for the front bottom edge.
You should have two tree shapes and a small strip of felt for the front bottom edge.
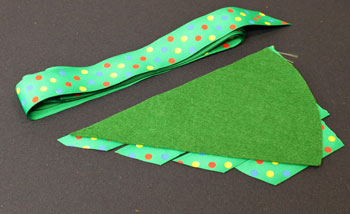
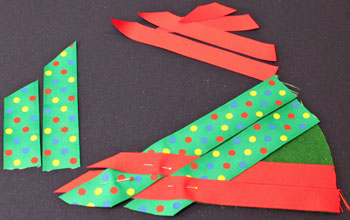
Cut the pieces of the first ribbon.
Lay the ribbon along the straight edge of the tree shape.
Make one end roughly even with the curved bottom edge of the felt.
Cut the other end roughly 1/2 inch beyond the other straight edge.
Continue laying the ribbon side by side until the opposite corner of the tree shape is met.
For the 1 1/2 inch wide ribbon, four pieces of the ribbon cover the tree shape.
Follow the same steps with the second ribbon.
For the 1 inch wide ribbon, six pieces cover the tree shape.
For the 1 inch wide ribbon, six pieces cover the tree shape.
Begin with the two longest pieces of ribbon.
Decide which you want to be on top at the top of the tree.
Lay that ribbon over the other, and pin the two ribbons to the top of the felt tree.
Make sure the ribbons extend over the two straight edges of the felt.
Decide which you want to be on top at the top of the tree.
Lay that ribbon over the other, and pin the two ribbons to the top of the felt tree.
Make sure the ribbons extend over the two straight edges of the felt.
Add the second two longest ribbons.
Alternately weave these two ribbons with the first two.
Pin the ribbons in place making sure the ends extend over the felt tree's straight edges.
Alternately weave these two ribbons with the first two.
Pin the ribbons in place making sure the ends extend over the felt tree's straight edges.
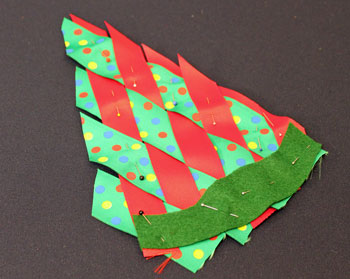
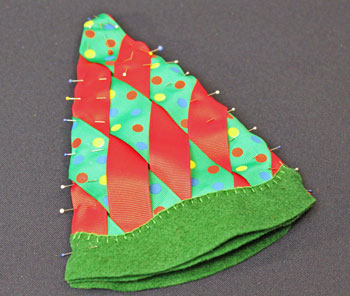
Continue adding and weaving the ribbons until the front of the Easy Christmas Crafts Woven Ribbon Christmas Tree Door Hanger is completely covered.

Turning over the pinned shape, you can see how the ribbons extend beyond the felt tree.
These ends will be turned under later.
These ends will be turned under later.
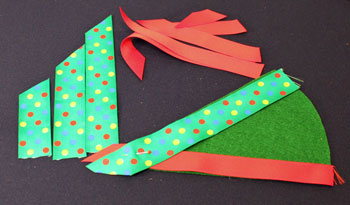
Pin the small strip of felt to the bottom of the front of the tree.
Match the side and bottom edges of the felt.
Match the side and bottom edges of the felt.
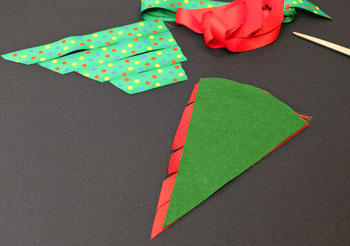
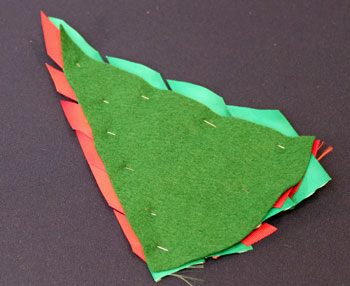
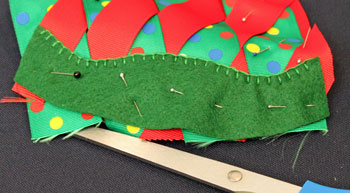
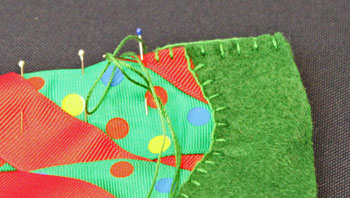
Use an easy blanket stitch to attach the top of the small felt strip to the front of the Easy Christmas Crafts Woven Ribbon Christmas Tree Door Hanger. (See the instructions: how to sew a blanket stitch overlay.)
Make sure your stitches go through the ribbon to the felt backing. These stitches anchor the ribbons in place.
Make sure your stitches go through the ribbon to the felt backing. These stitches anchor the ribbons in place.
Apply the blanket stitch all the way across the top of the felt strip.
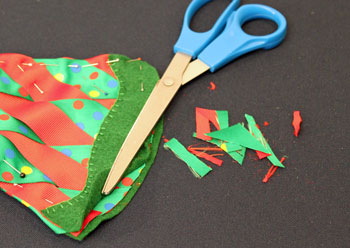
Trim the ends of ribbon between the felt strip and felt tree shape being careful not to cut the felt.
Cut the ribbon ends roughly 1/4 inch shorter than the felt edges.
Cut the ribbon ends roughly 1/4 inch shorter than the felt edges.
Fold the ribbon extensions to the back of the felt tree shape.
Temporarily pin the ribbon ends.
Temporarily pin the ribbon ends.
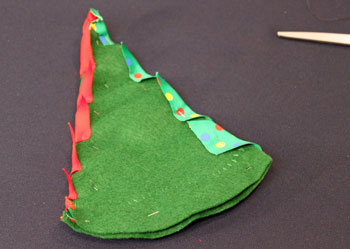
Turn the front of the Easy Christmas Crafts Woven Ribbon Christmas Tree Door Hanger over and place it on top of the other felt tree shape matching their edges.
Pin the straight edges together.
Place enough pins to hold the ribbon ends in place until they can be stitched.
Pin the straight edges together.
Place enough pins to hold the ribbon ends in place until they can be stitched.
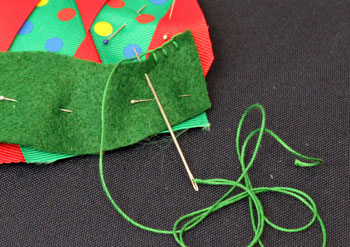
Beginning at a corner (I'm right handed, so I began on the right side), use the easy blanket stitch to hold the ribbons and felt together.
Make sure each stitch goes through all of the ribbons and felt along the edges. (See the blanket stitch instructions: how to sew a blanket stitch.)
Make sure each stitch goes through all of the ribbons and felt along the edges. (See the blanket stitch instructions: how to sew a blanket stitch.)
When you get to the top point, position the ribbons and felt to your satisfaction. The thicker the ribbon, the more difficult it is to fold the ribbon points into the proper shape.
Don't get frustrated, just take a little time to position the ribbons. And, for thick ribbon (which grosgrain borders are thick), a perfect sharp point is not achievable.
Remember, the hanging ribbon will hide the uppermost point.
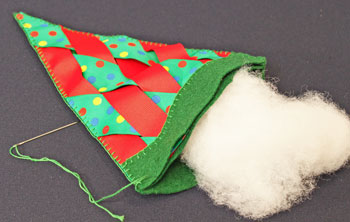
After stitching both straight edges of the Easy Christmas Crafts Woven Ribbon Christmas Tree Door Hanger, push the polyester fiberfill into the tree shape.
Use your fingers or the closed point of the scissors to push a small amount into the top of the cone.
Finish sewing across the rounded bottom edge of the filled shape.
Don't get frustrated, just take a little time to position the ribbons. And, for thick ribbon (which grosgrain borders are thick), a perfect sharp point is not achievable.
Remember, the hanging ribbon will hide the uppermost point.
After stitching both straight edges of the Easy Christmas Crafts Woven Ribbon Christmas Tree Door Hanger, push the polyester fiberfill into the tree shape.
Use your fingers or the closed point of the scissors to push a small amount into the top of the cone.
Finish sewing across the rounded bottom edge of the filled shape.
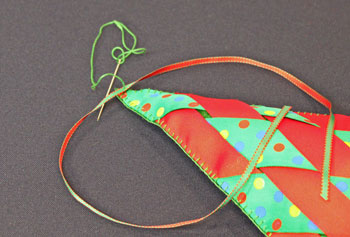
Fold the narrow hanging ribbon in half to find the center point.
Stitch the center of the narrow ribbon to the top of the tree shape.
Leaving the ribbon ends open allows the Easy Christmas Crafts Woven Ribbon Christmas Tree Door Hanger to be used in more ways such as for door handles and drawer pulls rather than knobs.
Stitch the center of the narrow ribbon to the top of the tree shape.
Leaving the ribbon ends open allows the Easy Christmas Crafts Woven Ribbon Christmas Tree Door Hanger to be used in more ways such as for door handles and drawer pulls rather than knobs.
The Easy Christmas Crafts Woven Ribbon Christmas Tree Door Hanger is finished.
You can tie the ribbon ends in a knot for placing over a door knob.
Or you can leave the ends free to tie through a door handle.
You can tie the ribbon ends in a knot for placing over a door knob.
Or you can leave the ends free to tie through a door handle.
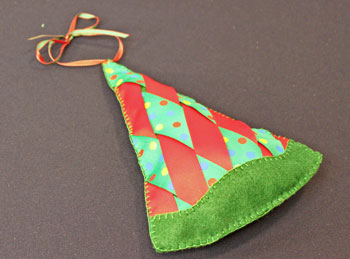
The finished Easy Christmas Crafts Woven Ribbon Christmas Tree Door Hanger is pretty and bright.
This second version includes ribbons of the same width (1 1/2 inches) in sheer bright red and sheer dark green.
The result of the two overlapping ribbon colors become almost a burgundy harlequin pattern.
The felt in this version is a darker green. A gold ribbon forms the hanging ribbon.
The result of the two overlapping ribbon colors become almost a burgundy harlequin pattern.
The felt in this version is a darker green. A gold ribbon forms the hanging ribbon.

The steps for the Easy Christmas Crafts Woven Ribbon Christmas Tree Door Hanger are easy and don't take long at all to do.
Have fun making your versions of the simple but pretty little tree!
Make a few or many of your own Easy Christmas Crafts Woven Ribbon Christmas Tree Door Hanger projects.
Have fun making your versions of the simple but pretty little tree!
Make a few or many of your own Easy Christmas Crafts Woven Ribbon Christmas Tree Door Hanger projects.


funEZcrafts
Welcome
Come on in and stay awhile...

funEZcrafts
Welcome
Come on in and stay awhile...