Easy Felt Crafts: Farm Puzzle - Felt
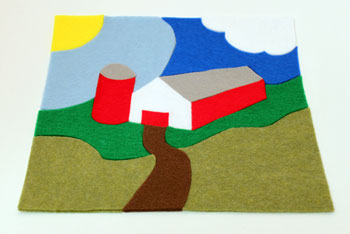
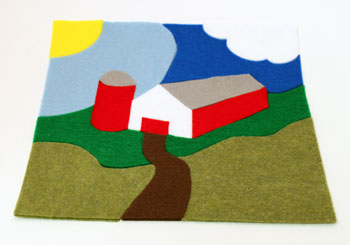
This easy felt crafts farm puzzle can be quickly completed and generate fun for little ones to enjoy over and over again.
It's similar to the Easy Paper Crafts Farm Puzzle, but the shapes are larger and the resulting puzzle larger - and softer.
Pieces of craft felt and simple tools make this an inexpensive and easy project to do. Let's look:
It's similar to the Easy Paper Crafts Farm Puzzle, but the shapes are larger and the resulting puzzle larger - and softer.
Pieces of craft felt and simple tools make this an inexpensive and easy project to do. Let's look:
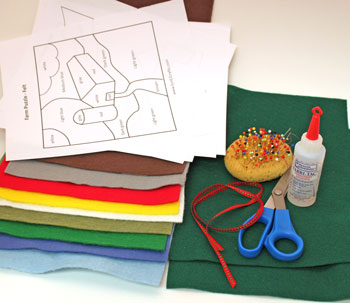
Easy Felt Crafts: Farm Puzzle Materials and Tools:
Easy Felt Crafts Farm Puzzle pattern (click to open PDF file)
Craft felt - one 9x12 inch piece in each of these colors: pale blue, medium blue, medium green, olive green, white, yellow, red, gray and brown for the farm
Craft felt - two pieces of 9x12 inch dark green for the bag to hold the puzzle
Fabric Glue (or non-toxic all-purpose glue that will glue fabric and remain flexible when dry)
Ribbon 1/4 inch wide by 24 inches long
Scissors
Pins (optional but help hold the pattern pieces when cutting)
The Steps for How to Make the Easy Felt Crafts: Farm Puzzle:
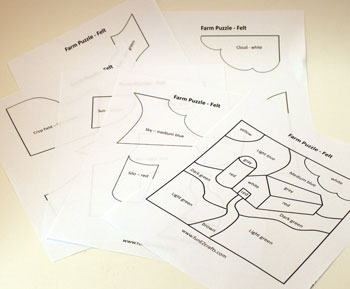
Print the pages for the Easy Paper Crafts Farm Puzzle Paper pattern.
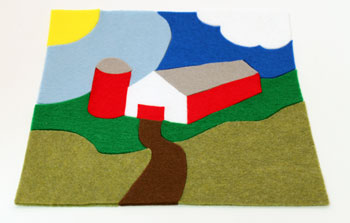
One page shows the colors for each portion of the farm puzzle.
The other pages include the patterns for each of the craft felt farm puzzle pieces.
One page shows the colors for each portion of the farm puzzle.
The other pages include the patterns for each of the craft felt farm puzzle pieces.
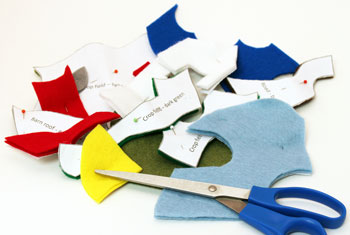
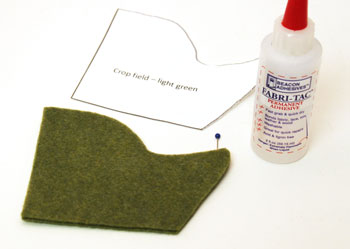
Cut around each of the pattern pieces. You can cut outside the lines then cut along the lines when cutting the felt pieces.
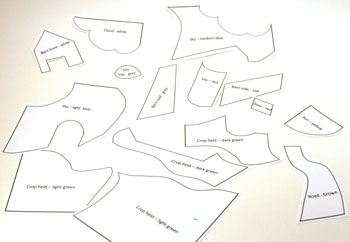
There should be two pieces of craft felt cut using each pattern piece.
The two pieces glued together offer more stability than just a single thickness of craft felt.
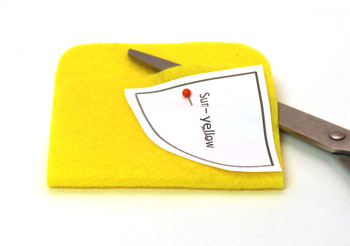
Pin the pattern piece to two thicknesses of the felt.
Or, if your scissors are not cooperating, pin to one thickness at a time.
The two pieces glued together offer more stability than just a single thickness of craft felt.
Pin the pattern piece to two thicknesses of the felt.
Or, if your scissors are not cooperating, pin to one thickness at a time.
Cut two felt shapes for each pattern piece.
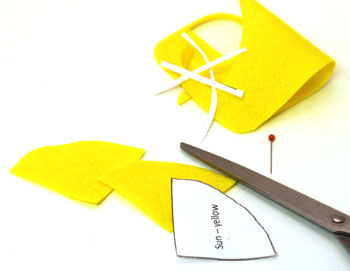
Cut two of each of the other easy felt crafts farm puzzle pieces.
Make sure the edges match and pin the two felt shapes on one side.
Separate the other side and apply glue in a zigzag pattern in the middle and a thin line near the edge. Press the craft felt shapes together.
Separate the other side and apply glue in a zigzag pattern in the middle and a thin line near the edge. Press the craft felt shapes together.
Move the pin and glue the other side of the puzzle pieces together.
Make sure the edges are securely glued as they will receive the most wear.
Make sure the edges are securely glued as they will receive the most wear.
Glue all of the craft felt puzzle pieces together.
Put the puzzle together.
If an edge does not fit properly, carefully trim the felt.
This may take a few test cuts.
Remember, you can always trim off more, but you can't easily add back if you trim too much.
Put the puzzle together.
If an edge does not fit properly, carefully trim the felt.
This may take a few test cuts.
Remember, you can always trim off more, but you can't easily add back if you trim too much.
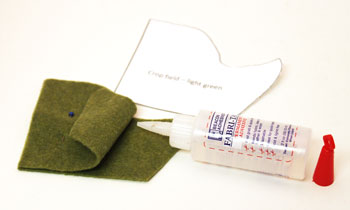
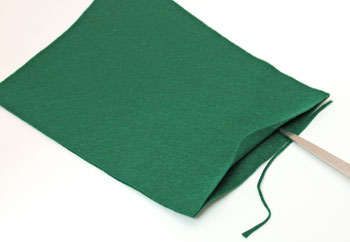
For the craft felt bag to hold the easy felt crafts farm puzzle, position the two dark green felt pieces together.
Apply glue along three of the edges - two long edges and one narrow edge.
The glue should be a thin zigzag line gluing 1/4 to 3/8 inch along the edges.
Apply glue along three of the edges - two long edges and one narrow edge.
The glue should be a thin zigzag line gluing 1/4 to 3/8 inch along the edges.

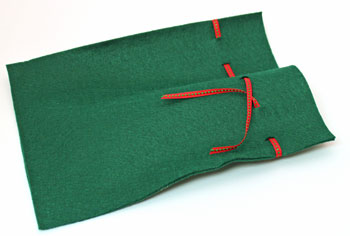
Trim the top, open end if the edges are not even.
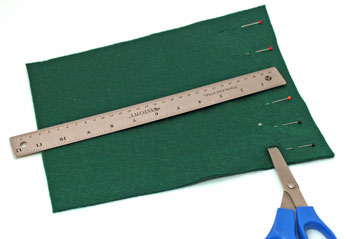
Measure and mark using pins for the holes to carry the ribbon.
Measure 3/4 inch from the edge for the first set of holes - front and back.
Measure down 1 1/2 inches from the top. Mark with a pin.
Measure over 1 1/2 inch for the next holes - front and back - and down 1 1/2 inches from the top. Mark with a pin.
Continue measuring and marking. The last pin should be 3/4 inch from the opposite edge and 1 1/2 inches from the top.
Cut the holes vertically roughly 1/2 inch long through both thicknesses.
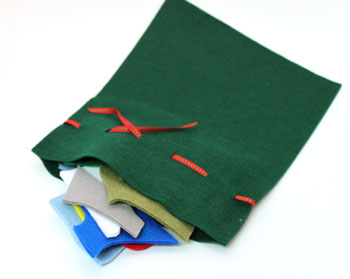
Thread the ribbon through the holes to form the drawstring for the bag.
Add the puzzle pieces to the bag.
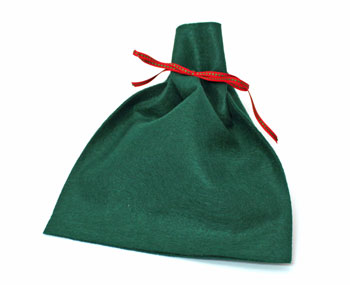
Pull the ribbon and tie into a bow to hold the Easy Felt Crafts Farm Puzzle in its craft felt drawstring bag.
When a little one wants to play with the puzzle, simply spill the puzzle pieces from the bag.
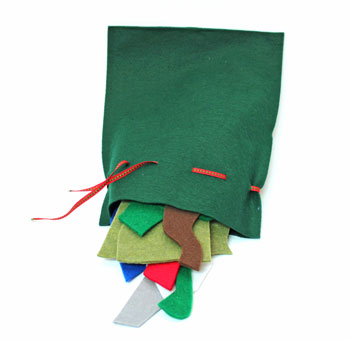
They can have fun putting the puzzle together, taking it apart and putting it together again.
This easy felt crafts farm puzzle offers inexpensive fun to make and becomes a soft fun toy for a little one to enjoy.
Check out the similar, but smaller, easy paper crafts farm puzzle too.
Have fun!
A few simple and inexpensive materials along with a few simple tools makes this easy felt crafts farm puzzle a great project to make and a fun puzzle for little ones in the future.
Check out the similar, but smaller, easy paper crafts farm puzzle too.
Have fun!
A few simple and inexpensive materials along with a few simple tools makes this easy felt crafts farm puzzle a great project to make and a fun puzzle for little ones in the future.


funEZcrafts
Welcome
Come on in and stay awhile...

funEZcrafts
Welcome
Come on in and stay awhile...