Easy Paper Crafts: Pin Hole Pictures
Do you like pictures but cannot draw?
How about a simple yet elegant way to make pictures?
Here's an easy paper crafts project showing how to make pin hole pictures.
It requires simple materials to do.
How about a simple yet elegant way to make pictures?
Here's an easy paper crafts project showing how to make pin hole pictures.
It requires simple materials to do.
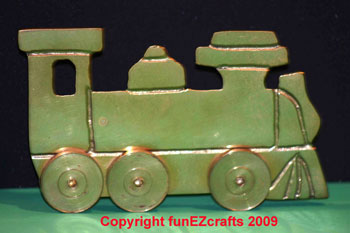
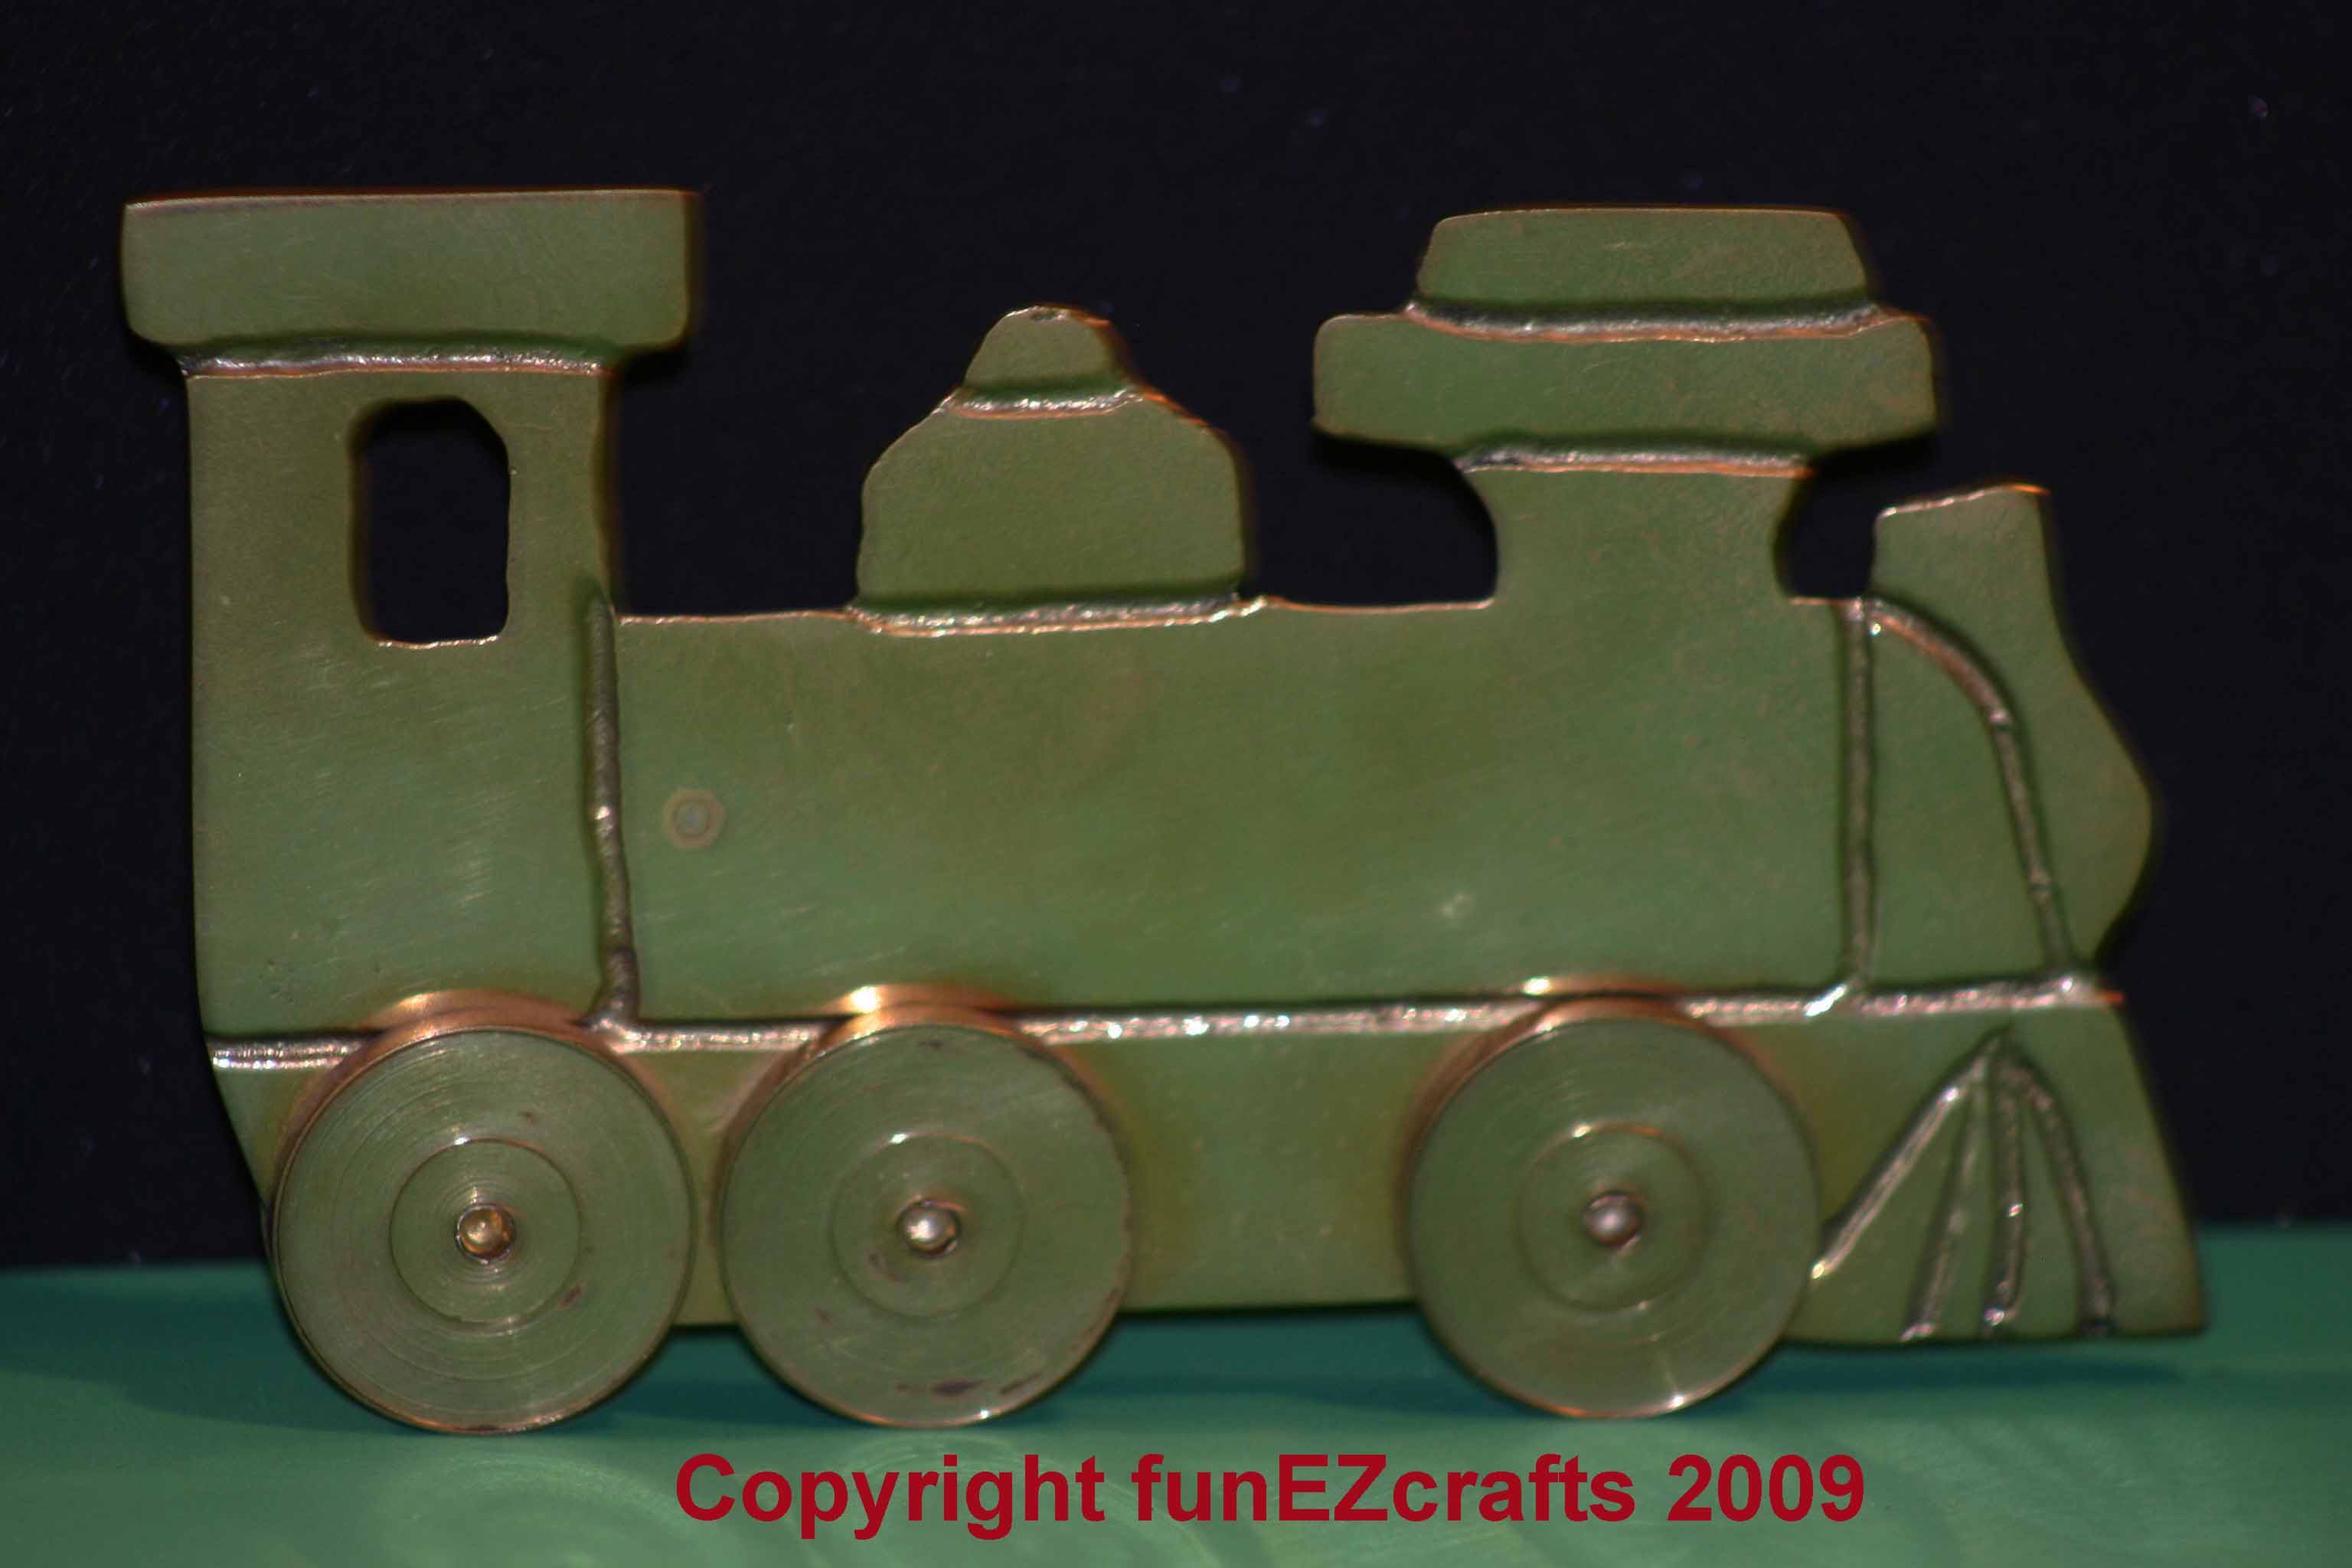
This simple project started with a picture of a brass train:
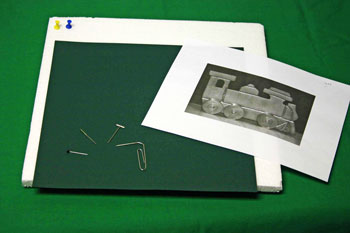
Let's take a look at the materials and tools for this project.
Easy Paper Crafts: Pin Hole Pictures Materials and Tools:
Paper - card stock or construction paper - darker colors work best for contrast
Punching tool - large straight pin, t-pin, paper clip or paper piercer
Supportive surface for tool to punch through behind picture - Styrofoam works well
Picture printed in grayscale
Thumbtacks
Scissors
Floating frame or clear acrylic frame (optional)
Punching tool - large straight pin, t-pin, paper clip or paper piercer
Supportive surface for tool to punch through behind picture - Styrofoam works well
Picture printed in grayscale
Thumbtacks
Scissors
Floating frame or clear acrylic frame (optional)
The Steps for How to Make the Easy Paper Crafts: Pin Hole Pictures:
Note: for your frame, you want light to come through the back to show the pin hole outlines.
A floating frame is a sandwich of two pieces of glass enclosed in a normal frame. Or, you can use an acrylic easel frame.
You can use your own pictures or you can download the pictures used in these examples.
The brass train, train cannister, pansy and blue vinca photographs have links below for downloading.
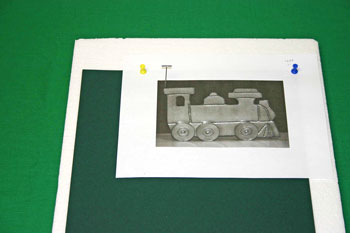
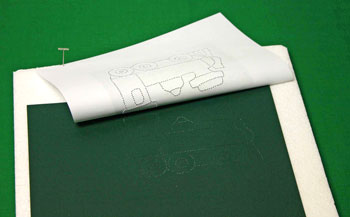
Position the grayscale picture over the cardstock in order to make the final size picture you want - in this case 6 x 8 inches.
Place both the picture and card stock over a supportive surface that will allow the pin to punch through both the picture and the card stock.
Hold both the cardstock and the grayscale picture in place with thumbtacks.
In this example, a rectangle of packaging Styrofoam holds the project.
It supports the picture yet allows you to pierce the papers easily.
Once positioned properly, begin punching holes along the lines you have chosen to include in your project.
Remember, just because the line is in the photograph does not mean you have to include it. (For example, "Merry Christmas" was not included in the other train picture below.)
For this picture, a t-pin was used. (Note: regular straight pins do not make large enough holes unless you twist them to make each hole bigger.)
Punch the holes close enough together to show the outline clearly but not so close together that you cut the paper.
Generally, 1/16 inch separation between the punched holes gives the best outline.
When you think you have finished all the outlines, leave the thumbtacks holding the corners and lift the grayscale picture from the cardstock to see if the punched outline looks good or if you need more holes.
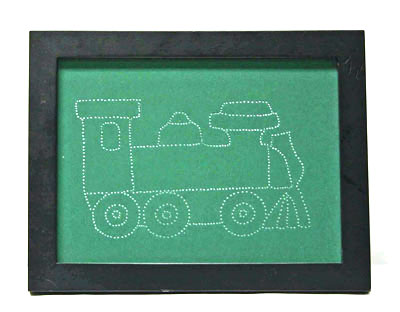
Trim your punched pin hole picture to the right dimensions for your frame.
Frame your work and place in front of a light source or a light background.
Your outline will show your picture.
Frame your work and place in front of a light source or a light background.
Your outline will show your picture.
Of course, you do not have to use a frame. You can place your picture in a window or on a light background (e.g., white refrigerator) to enjoy.
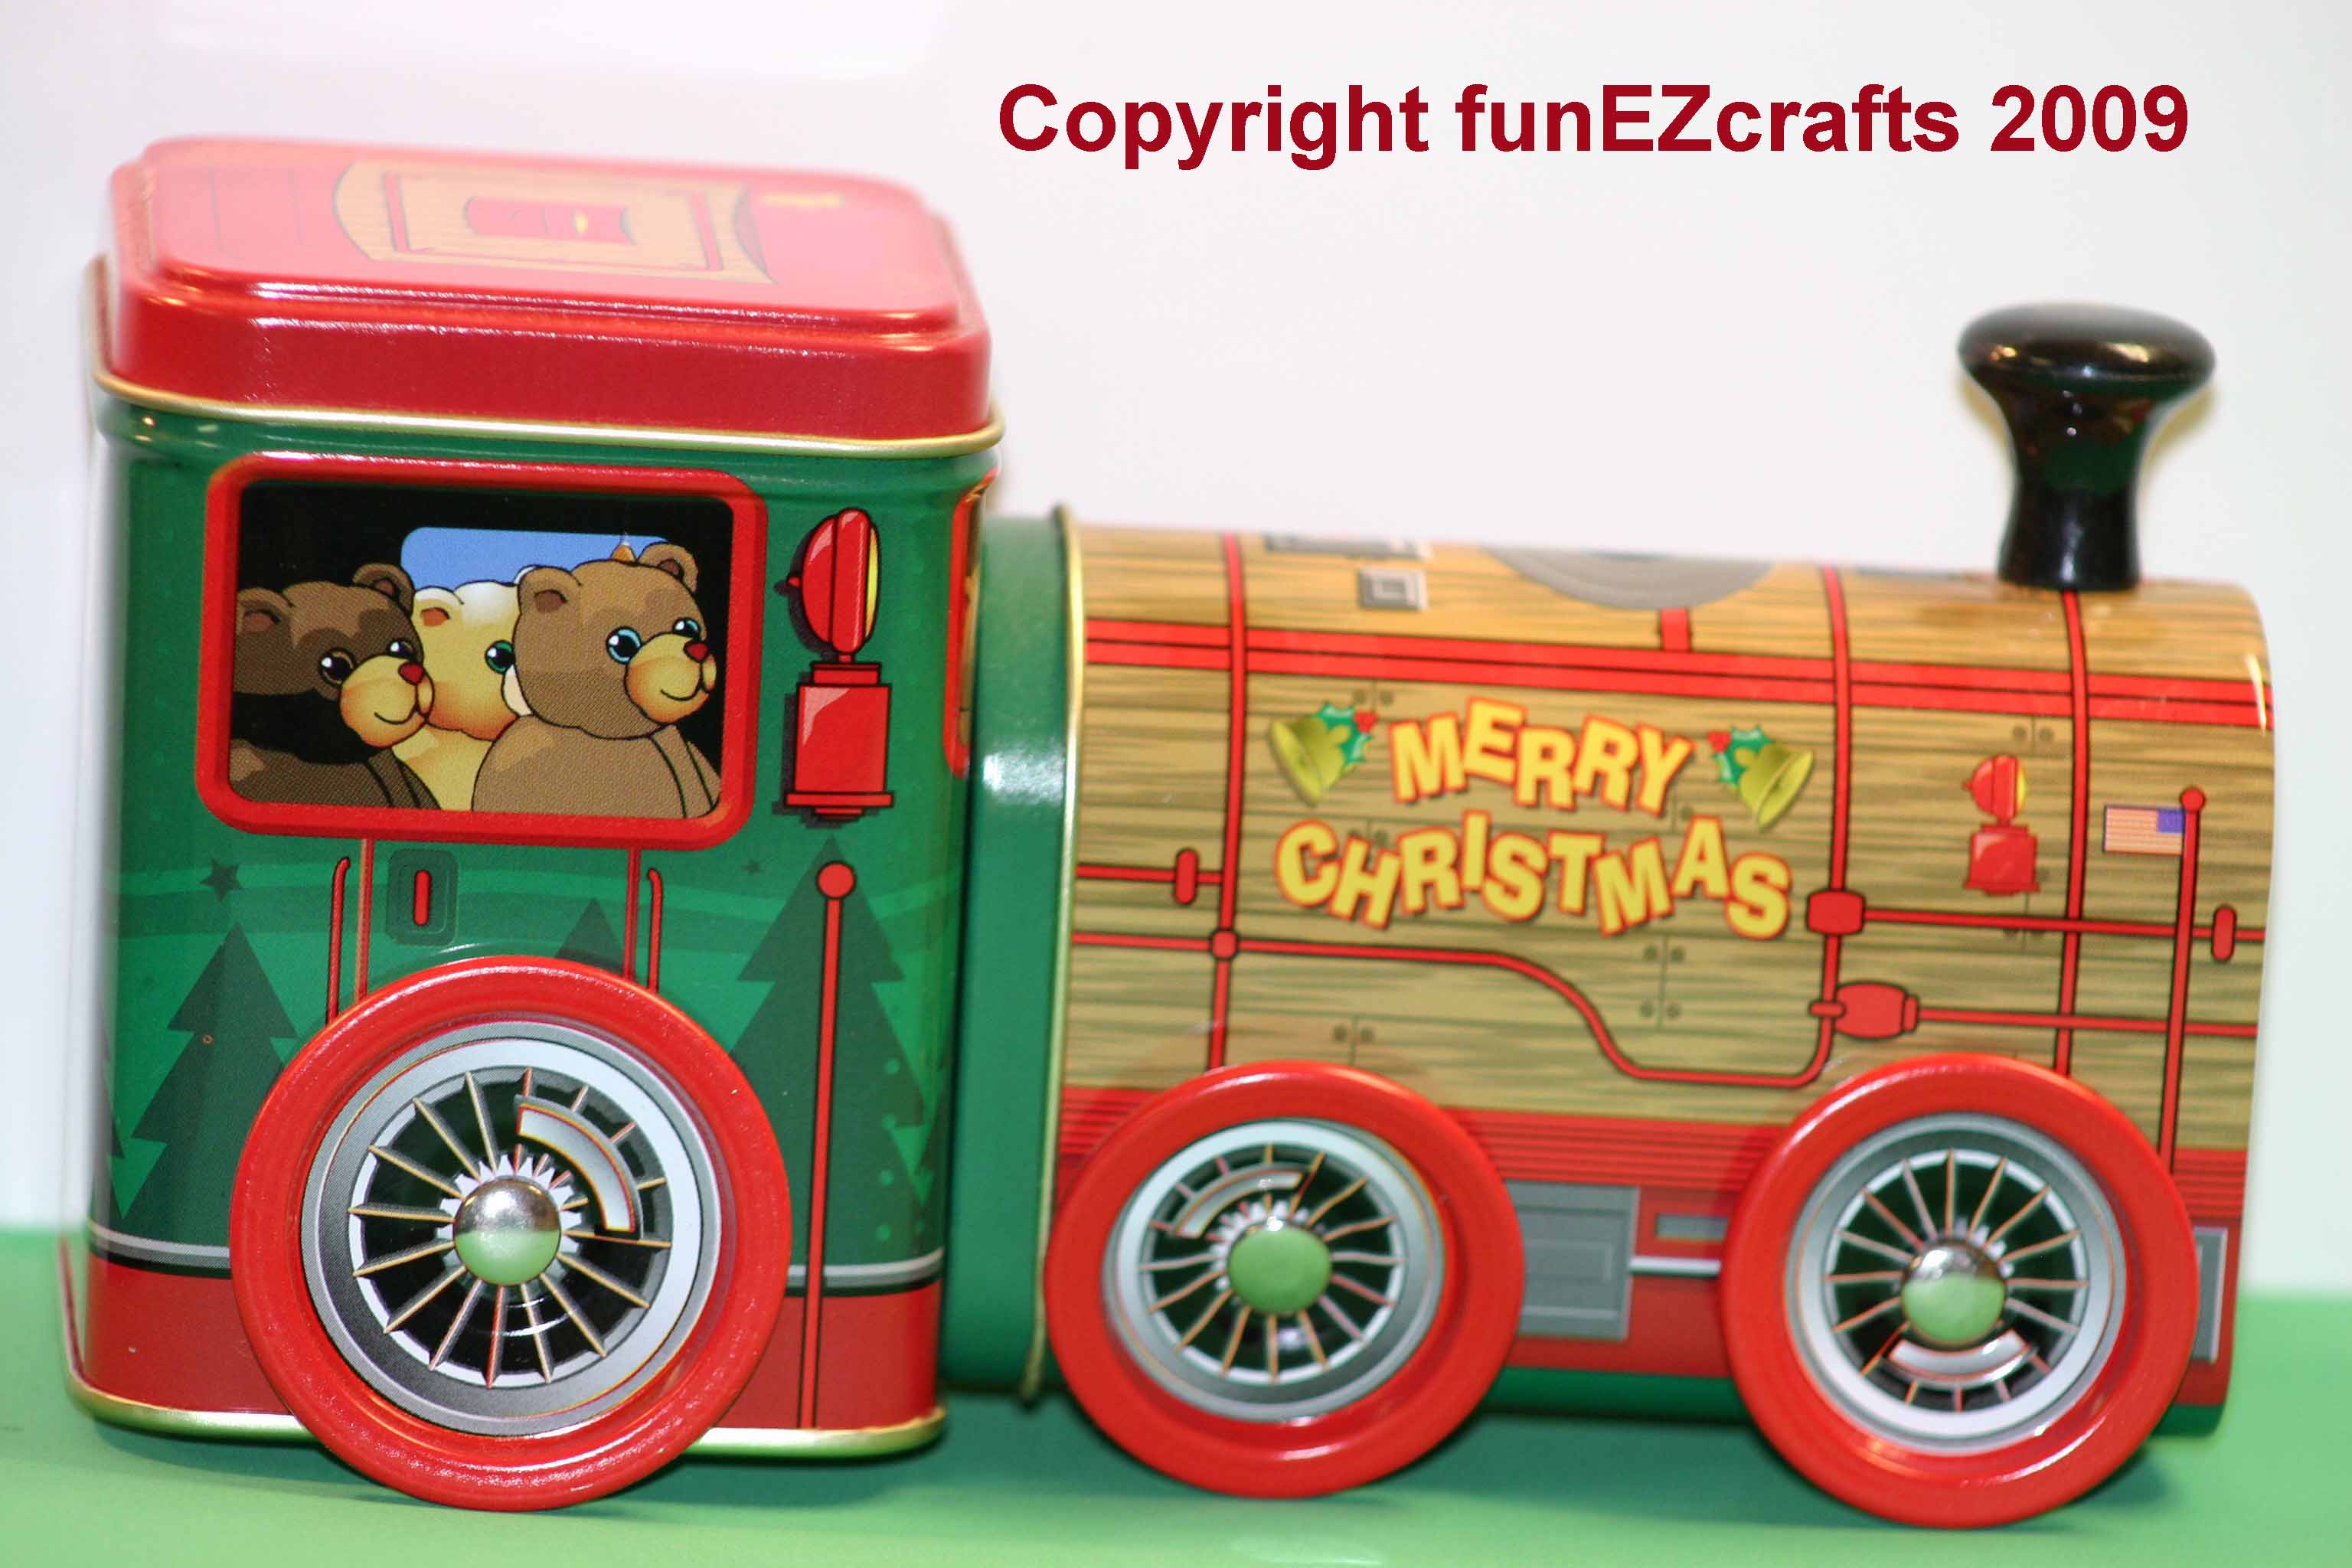
Here's another example train picture:
Here's another example train picture:
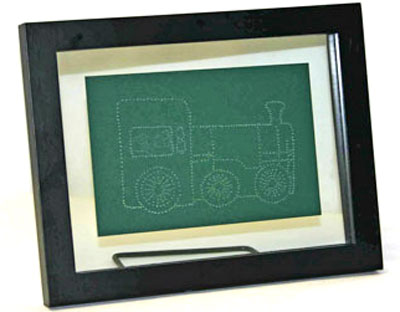
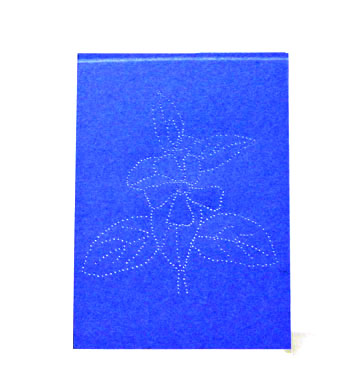
In this picture, you can see how the float frame works.
The finished dimensions were 4 x 6 inches floating in the 6 x 8 inches open space.
The glass sandwich shows around the finished project.
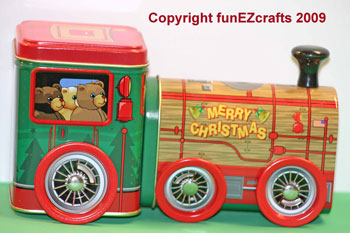
The original photograph includes more detail that was intentionally left out of the finished pin hole picture.
For example, the small, red light on the front was too small. Plus, the bears' details were not all punched.
The finished dimensions were 4 x 6 inches floating in the 6 x 8 inches open space.
The glass sandwich shows around the finished project.
The original photograph includes more detail that was intentionally left out of the finished pin hole picture.
For example, the small, red light on the front was too small. Plus, the bears' details were not all punched.
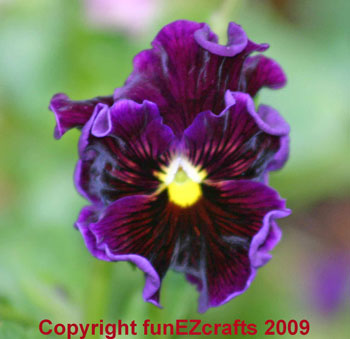
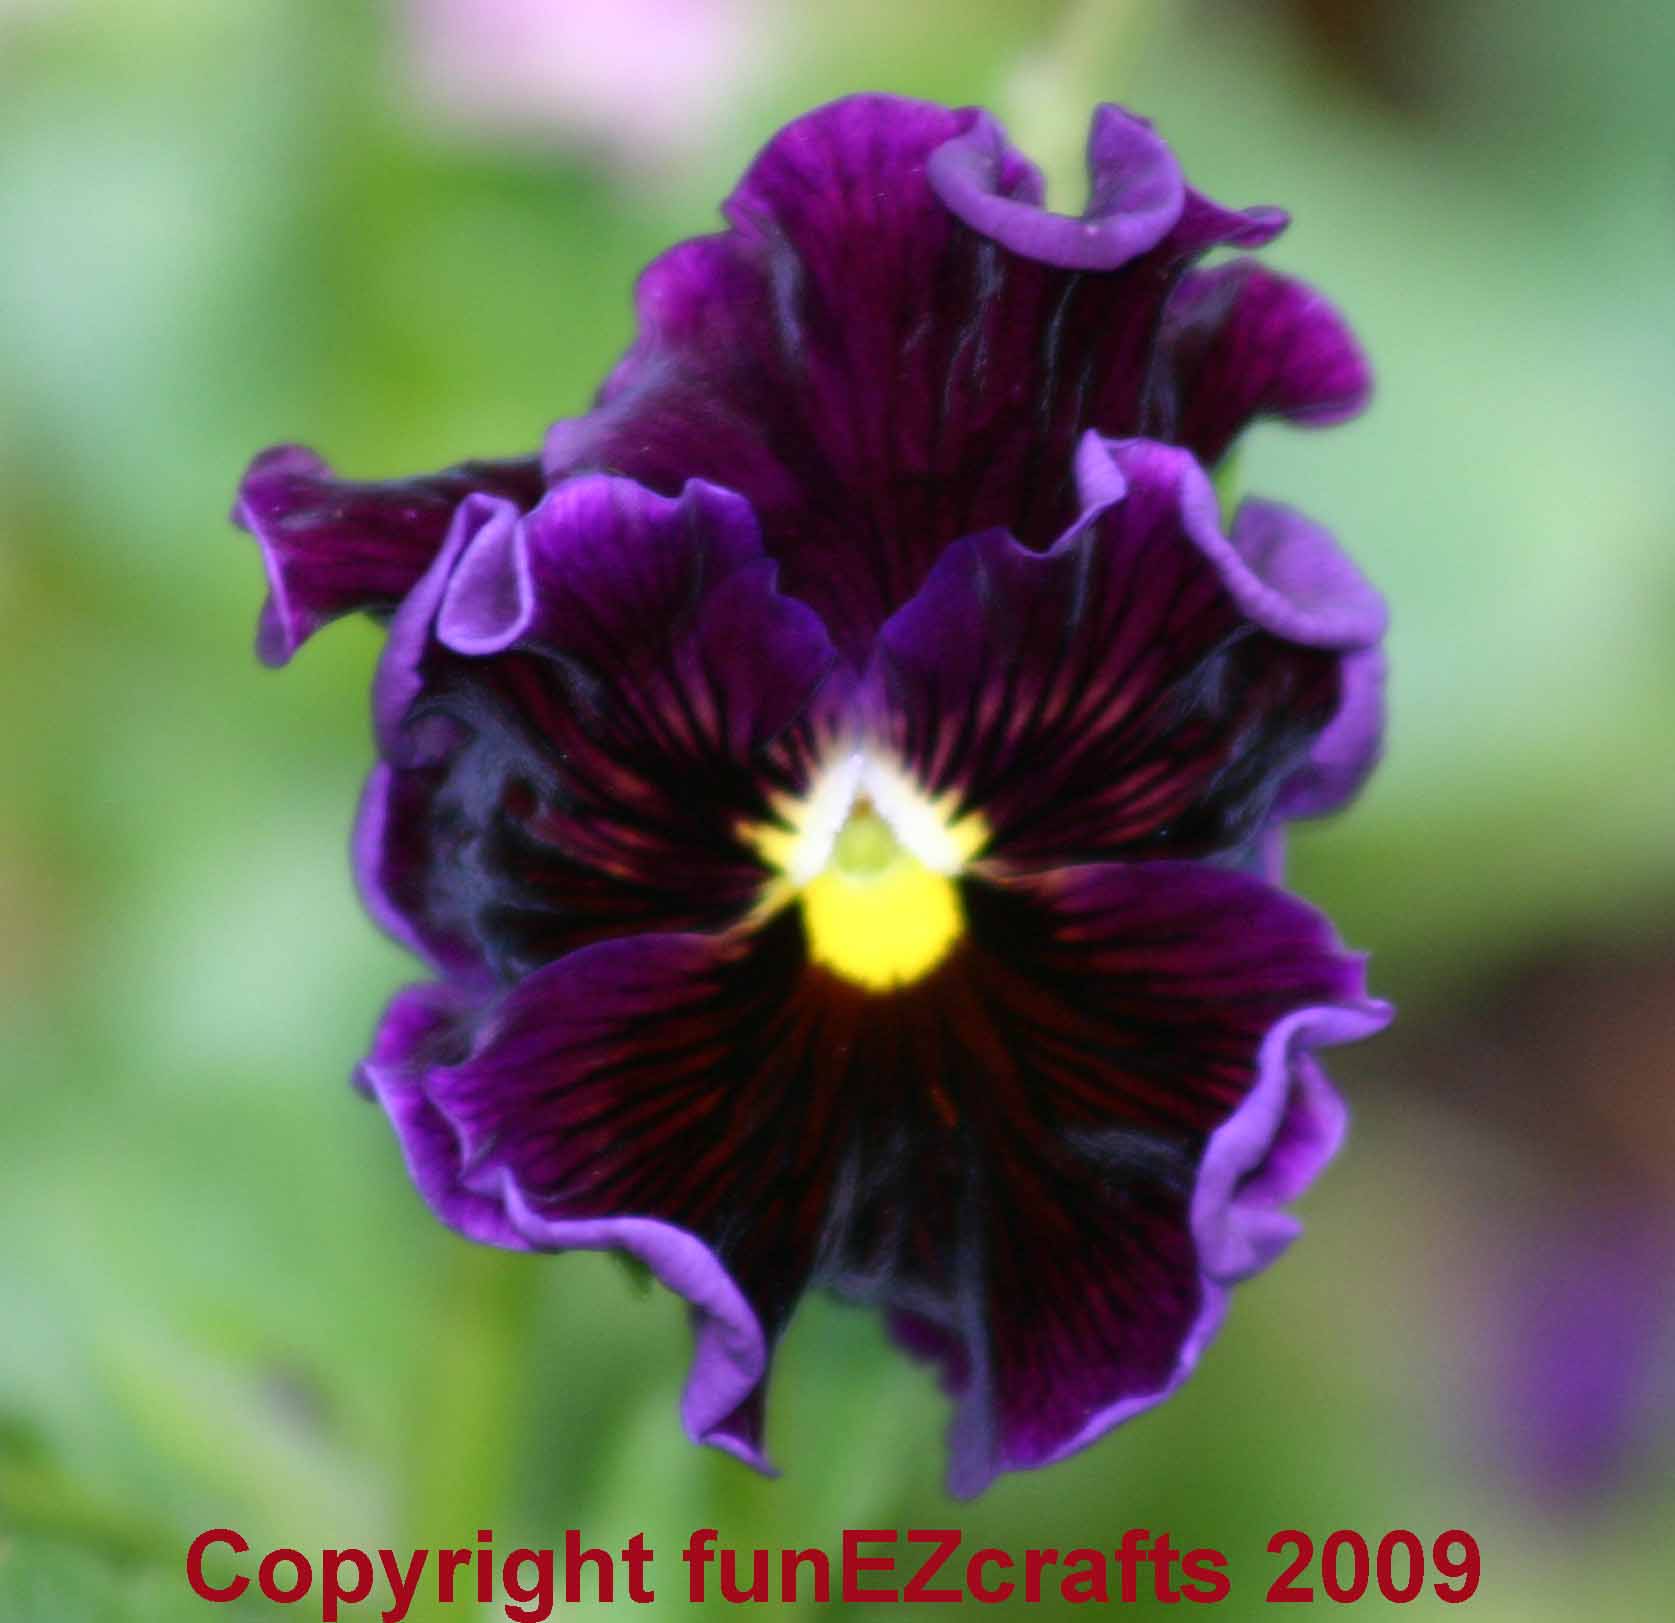
For different subjects, let's take a look at flowers. The first shows a pansy.
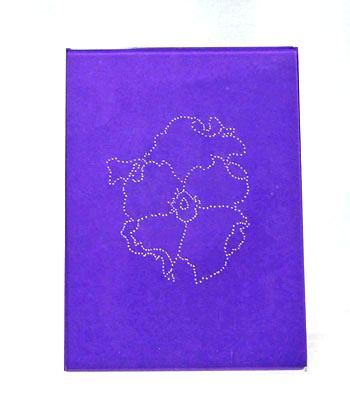
In this case, the original digital picture was cropped and the result printed with five inches width to fit within the 5 x 7 inches acrylic frame.
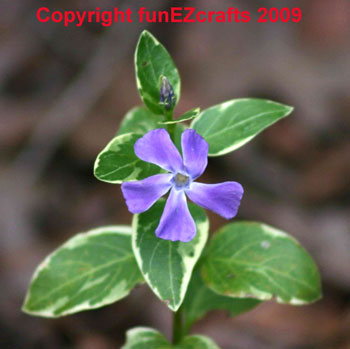
For another flower example, here is blue vinca.
Again, the original photograph was cropped then printed to fit within the 5 x 7 inches of the acrylic frame.
Click on the links below to download the pictures.
Easy Paper Crafts - Pin Hole Pictures - Brass Train
Easy Paper Crafts - Pin Hole Pictures - Train Cannister
Easy Paper Crafts - Pin Hole Pictures - Pansy
Easy Paper Crafts - Pin Hole Pictures - Blue Vinca
Enjoy!
Easy Paper Crafts - Pin Hole Pictures - Brass Train
Easy Paper Crafts - Pin Hole Pictures - Train Cannister
Easy Paper Crafts - Pin Hole Pictures - Pansy
Easy Paper Crafts - Pin Hole Pictures - Blue Vinca
Enjoy!


funEZcrafts
Welcome
Come on in and stay awhile...

funEZcrafts
Welcome
Come on in and stay awhile...
If you want to use your own photographs or maybe pictures from a calendar, look for images that have distinct lines such that the punched outline will clearly show the object.
First, decide how big you want your finished project to be.
Size the digital picture accordingly then print the picture on plain paper (not photo grade).
Printing in grayscale, rather than color, makes following the lines easier.
For this picture, the original digital photograph was 11 x 17 inches.
The float frame dimensions allowed for 6 x 8 inches.
Wanting some space around the train in the finished project, the picture was sized to print seven inches wide.