Easy Angel Crafts: Eyelet Lace Angel
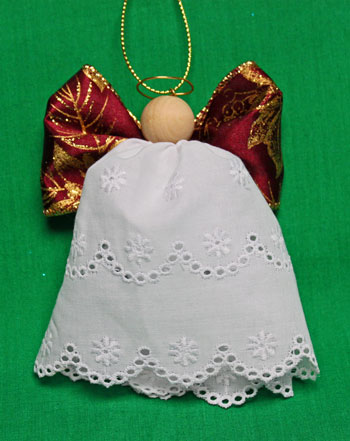
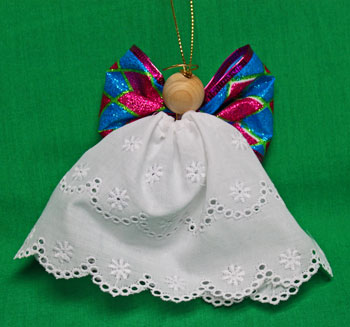
The Easy Angel Crafts Eyelet Lace Angel takes just a few minutes of time and just a few materials and tools.
Isn't this a pretty little angel? Take a look.
Isn't this a pretty little angel? Take a look.
Look below for the materials and the steps for how to make the eyelet lace angel:
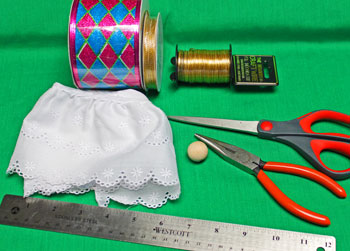
Easy Angel Crafts: Eyelet Lace Angel Materials and Tools:
Eyelet lace - 4 inches wide with one side gathered
Wire edged ribbon - 2.5 inches wide
Gold cord (can also use yarn or narrow ribbon)
Wooden bead - 20mm
Wire - 20 gauge gold-colored craft wire
Ruler
Scissors
Needle nose pliers
Wire edged ribbon - 2.5 inches wide
Gold cord (can also use yarn or narrow ribbon)
Wooden bead - 20mm
Wire - 20 gauge gold-colored craft wire
Ruler
Scissors
Needle nose pliers
The Steps for How to Make the Easy Angel Crafts: Eyelet Lace Angel:
Collect the materials and tools.
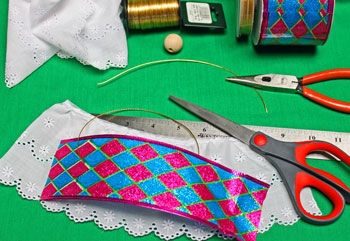
Cut one piece of the 4-inch wide eyelet lace 8 inches long.
Cut one piece of the 2.5-inch ribbon 8 inches long.
Cut one piece of the gold cord 8 inches long.
Cut one piece of the 20 gauge craft wire 8 inches long.
Should have called this the 8-inch angel. LOL
Cut one piece of the 4-inch wide eyelet lace 8 inches long.
Cut one piece of the 2.5-inch ribbon 8 inches long.
Cut one piece of the gold cord 8 inches long.
Cut one piece of the 20 gauge craft wire 8 inches long.
Should have called this the 8-inch angel. LOL
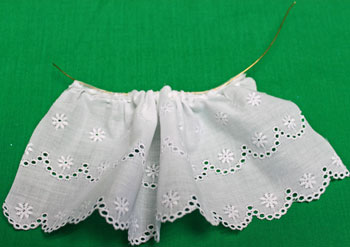
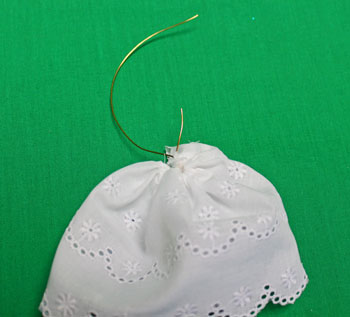
Push the craft wire through the gathered edge of the eyelet lace.
Push the lace on the wire and gather tightly with roughly one inch of the wire on one side of the gathers and the remaining wire on the opposite side.
Twist the wire ends together tightly.
Twist the wire ends together tightly.
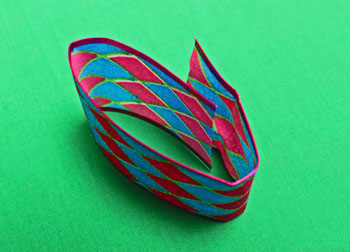
Make a circle with the 8-inch length of ribbon and overlap the ends.
Gently fold the circle with the overlapped ends on one side to begin forming the wings.
Gently fold the circle with the overlapped ends on one side to begin forming the wings.
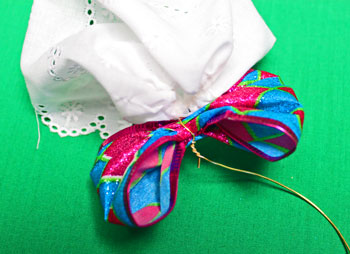
Pinch the middle of the gently folded wings and place between the wire ends on the back of the eyelet lace.
Wrap the two ends of the craft wire around the middle of the folded ribbon for the wings and twist tightly together.
Wrap the two ends of the craft wire around the middle of the folded ribbon for the wings and twist tightly together.
Bend the tightly twisted wire downward.
Wrap the long wire end under the folded ribbon and back up in front of the folded wings.
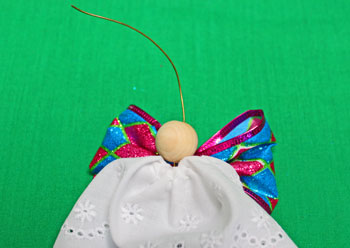
Push the craft wire up through the 20mm bead.
Wrap the long wire end under the folded ribbon and back up in front of the folded wings.
Push the craft wire up through the 20mm bead.
Push the bead tightly down on the wire.
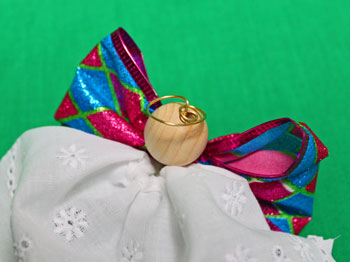
Make a small circle around the tip of the needle nose pliers at the top of the bead. This helps hold the bead in position and will hold the hanging loop.
Twist the wire into a larger loop for the halo shape.
Bend the end of the wire and push it into the bead.
Make a small circle around the tip of the needle nose pliers at the top of the bead. This helps hold the bead in position and will hold the hanging loop.
Twist the wire into a larger loop for the halo shape.
Bend the end of the wire and push it into the bead.
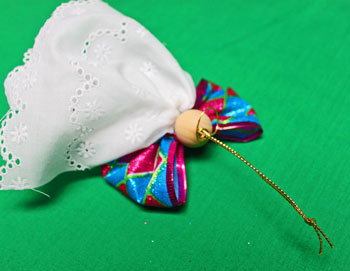
Push the gold cord through the small wire loop at the top of the bead.
Pull the ends of the gold cord even and tie into a knot to form the hanging loop.
Pull the ends of the gold cord even and tie into a knot to form the hanging loop.
Make any adjustments to fill out the wings and position the halo.
The Easy Angel Crafts Eyelet Lace Angel is finished and ready to display.
The Easy Angel Crafts Eyelet Lace Angel is finished and ready to display.
Simple and pretty, these little angels can be made in almost no time at all.
This little angel becomes a fun group project too, especially if you need several of the ornaments quickly.
Have fun!
The Easy Angel Crafts Eyelet Lace Angel uses just a few inexpensive materials and tools. And if you are handy at drawing faces, use cosmetics to give each little angel personality with facial features.

funEZcrafts
Welcome
Come on in and stay awhile...

funEZcrafts
Welcome
Come on in and stay awhile...
