How To: Repair a Jeans Pocket
Do you or someone you know carry so much stuff in their jeans pockets that holes appear and things fall out?
The steps below show how to repair a jeans pocket.
With a little time and few materials, those jeans will once again carry the "stuff."
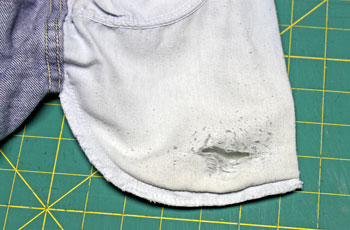
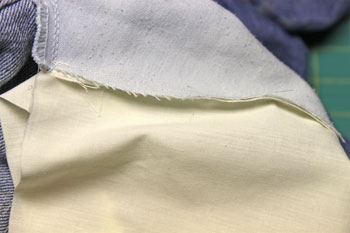
Let's look at the hole in the pocket of this pair of jeans.
The steps below show how to repair a jeans pocket.
With a little time and few materials, those jeans will once again carry the "stuff."
Let's look at the hole in the pocket of this pair of jeans.
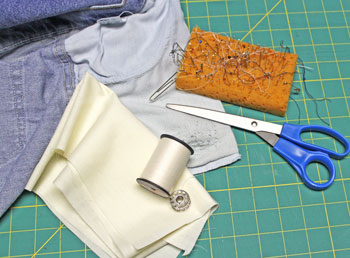
How to Repair a Jeans Pocket: Materials and Tools:
jeans with torn pocket
sturdy but lightweight fabric for repair
thread
scissors
pins
sewing machine (bobbin is shown)
sturdy but lightweight fabric for repair
thread
scissors
pins
sewing machine (bobbin is shown)
If you don't have a sewing machine, you can still follow the steps.
Make small hand stitches with needle and thread where machine sewing is shown.
Double stitch for strong seams.
Make small hand stitches with needle and thread where machine sewing is shown.
Double stitch for strong seams.
The Steps for How to Repair a Jeans Pocket:
Lay the pocket flat.
Cut across the pocket through both thicknesses roughly 1/2 inch above the hole and weakened area of the jeans pocket.
Cut across the pocket through both thicknesses roughly 1/2 inch above the hole and weakened area of the jeans pocket.
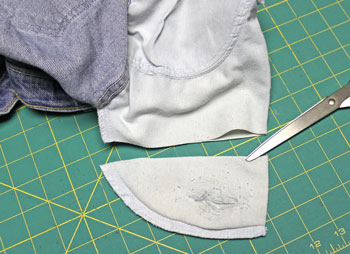
Cut a piece of repair fabric that folded in half is the same width as the bottom of the cut pocket.
The length should be longer than the longest portion of the cut off pocket.
This fabric is from left-over sheet material. (Sheets, especially on sale, provide a lot of fabric for many different projects.)
You could also use a portion of a shirt that you no longer want for the repair fabric in these steps for how to repair a jeans pocket.
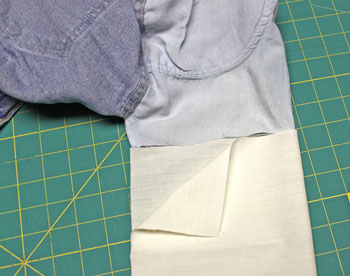
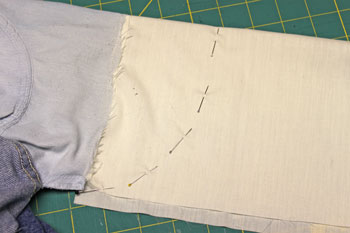
Pin the right side of the repair fabric to the inside of the cut pocket.
If you can't determine right and wrong sides, don't worry, just pin the fabric inside the pocket matching the edges.
If you can't determine right and wrong sides, don't worry, just pin the fabric inside the pocket matching the edges.
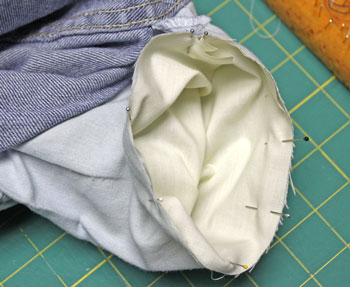
Pin the repair fabric up to the edge seam in the cut pocket.
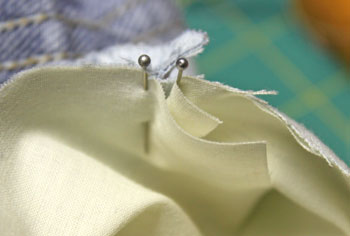
To attach, we will begin sewing at one pin and go around to the other pin but leave the area between the two pins open.
To attach, we will begin sewing at one pin and go around to the other pin but leave the area between the two pins open.
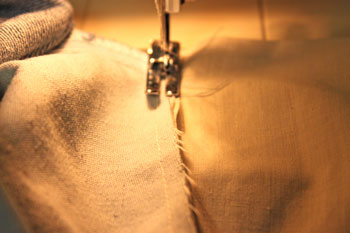
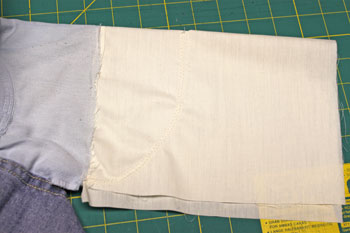
Sew a narrow seam connecting the repair fabric to the pocket.
Use 10-12 stitches per inch.
Use 10-12 stitches per inch.
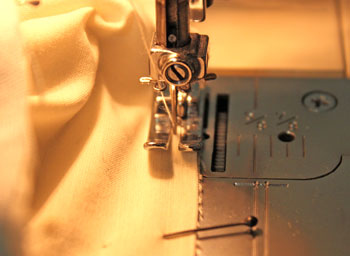
Make the seam 1/4 to 3/8 inches wide.
A larger seam adds too much bulk.
A larger seam adds too much bulk.
Pull the repair fabric from inside the pocket.
You can see the edge on the left is still open.
But, before we close that edge, let's add strength to the connecting seam.
You can see the edge on the left is still open.
But, before we close that edge, let's add strength to the connecting seam.
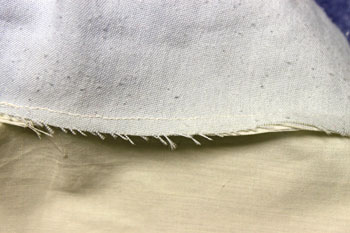
Flatten the seam toward the repair fabric.
Sew along the edge of the previous seam's stitches through both layers of the seam and the repair fabric.
The stitches should be very close to the earlier stitches.
Sew along the edge of the previous seam's stitches through both layers of the seam and the repair fabric.
The stitches should be very close to the earlier stitches.
In our how to repair a jeans pocket steps, the repair fabric is now securely fastened to the pocket.
But, we need to finish the bottom of the pocket.
But, we need to finish the bottom of the pocket.

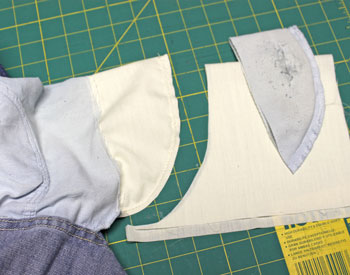
Use the piece of pocket that was cut off to determine where to sew the bottom of the pocket.
Place the torn pocket piece over the repair fabric.
Place pins in the repair fabric - but not through the torn pocket - around the curved edge of the pocket piece.
Place the torn pocket piece over the repair fabric.
Place pins in the repair fabric - but not through the torn pocket - around the curved edge of the pocket piece.
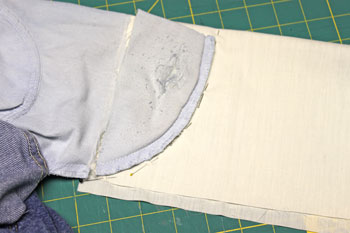
Remove the torn pocket.
The pins show where the bottom edge of the pocket should be.
The seam will be just above those pins.
The pins show where the bottom edge of the pocket should be.
The seam will be just above those pins.
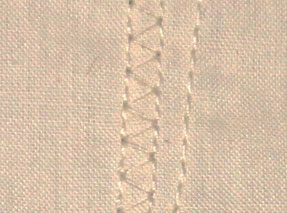
For added strength, sew along the curved bottom edge at least twice.
This close-up provides a view of the stitches.
This sewing machine has a built-in double-lined zig-zag stitch.
In addition another line of straight stitches was added for more strength.
This sewing machine has a built-in double-lined zig-zag stitch.
In addition another line of straight stitches was added for more strength.
Trim the excess repair fabric from the bottom of the pocket.
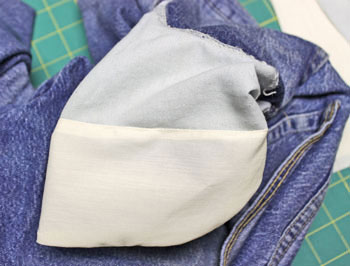
This next view shows the inside of the pocket.
The raw seams are on the outside of the pocket, which is inside the leg of the jeans.
The inside of the repair is finished where the "stuff" and the hand won't catch on an unfinished seam.
The raw seams are on the outside of the pocket, which is inside the leg of the jeans.
The inside of the repair is finished where the "stuff" and the hand won't catch on an unfinished seam.
Denim jeans last and last and get better with age.
Their pockets, on the other hand, can wear out long before the jeans do.
Use our how to repair a jeans pocket instructions to help you get more enjoyment out of your jeans.
Their pockets, on the other hand, can wear out long before the jeans do.
Use our how to repair a jeans pocket instructions to help you get more enjoyment out of your jeans.


funEZcrafts
Welcome
Come on in and stay awhile...

funEZcrafts
Welcome
Come on in and stay awhile...