How to fold a six-point star from hexagons

This easy paper crafts project takes a little time to learn, but once you know the steps, it’s very simple to do.

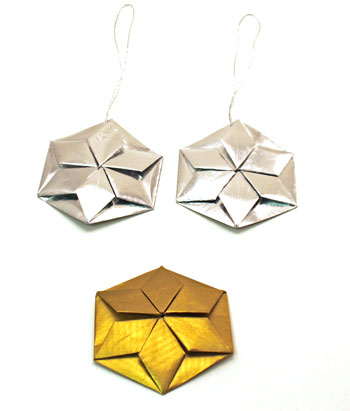
Take a look at these pretty easy paper crafts six point stars made from folding paper hexagons:

Easy Paper Crafts Six-Point Stars from folded hexagons

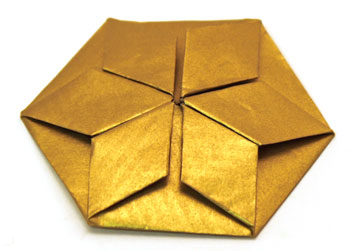
Here’s a close-up view of the gold six-point star made with the steps on the Easy Paper Crafts Six Point Star page.

Easy Paper Crafts Six Point Star gold with all points folded

One caution, you need to be careful with your measurements. The project doesn’t require perfection, but if the lines or angles are off by much, the resulting star will show the problems.

Don’t let that scare you. The easy paper crafts six point star is simple once you do one or two or three.

Plus, they make pretty decorations any time of the year – hanging in a window, added to a gift, given to a child for a job well done, or any other application you can think about.

Enjoy!

Gifts from the heart in ornaments

The news today claims the traditional holiday shopping weekend after the Thanksgiving holiday last week saw an increase in the retail sales over the last couple of years. It will be interesting to see if the same holds true for today’s Cyber Monday sales on the internet.

Regardless, many people still struggle with their finances in these tough economic times and struggle with how to buy holiday gifts for all of the people on their list this year.

Handmade gifts are nice. We offer several different projects on our main www.funEZcrafts.com site for fun and interesting gifts.

But, perhaps in addition to lack of discretionary funds, you lack the time to make gifts for everyone on your holiday list.

Have you though of gifting your skills and time to help your family and friends? Maybe you think you don’t have skills that people on your list need. In many cases, it’s not always a skill someone needs. Your time and efforts helping them do a task they can’t do by themselves or helping them do something that needs to be done but they’ve put off would be very much appreciated.

It’s simple to gift your time and efforts. You can write a promissory note – either by hand or on your computer – and wrap it in a gift box.

Or, you can add the gift as a decoration on the tree.

We have several ornaments that would be easy to make and add to the tree with a promissory note inside.

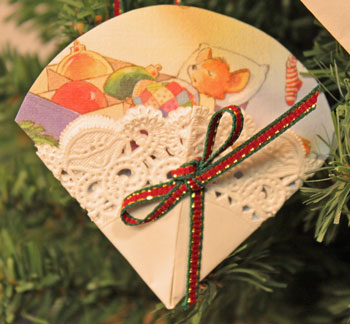
Our Paper Doily Greeting Card Ornament could just as easily include a note with your promise of time and effort.

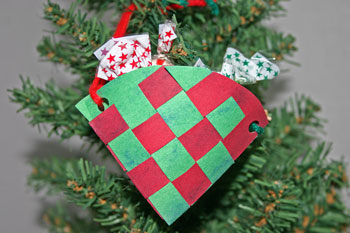
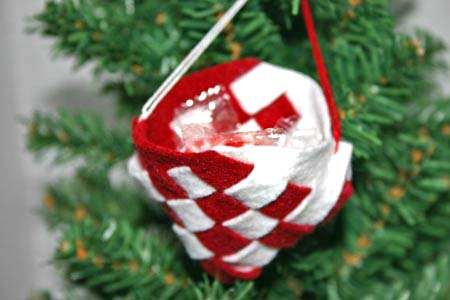
Another easy ornament, the Paper Basket Cone Ornament, would also hold a rolled promissory note.

A similar version made of felt can be used instead.

Children, young and not-so-young, can get into the spirit of the season by making these ornaments and adding their own promises as gifts. They could have fun making the ornaments while they learn the spirit of giving and the responsibility of following through on their promises.

Some examples of children’s promises:

  • I promise to do my assigned chores without having to be prompted for three months
  • I promise to write Grandma and Grandpa once a week for six months
  • I promise to wash the car ten times
  • I promise to prepare dinner once a week for six weeks

The list is endless and should be applicable to each child’s abilities and the family’s interests and needs. The promise should be worthwhile and not something they would be doing anyway.

On an adult scale, the promises could be doing tasks for someone, going somewhere with someone, and they can even be risque between consenting adults!

Don’t let the holidays become stressful. Use them to be creative and to give gifts worth more than money can buy to the recipients on your list!


New – Spiral Beaded Christmas Ornament

This pretty little Easy Christmas Crafts – Spiral Beaded Christmas Ornament can be make quickly and easily using inexpensive beads, wire and ribbon.

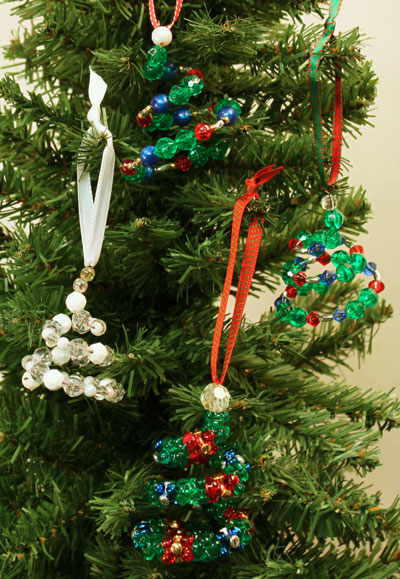
Take a look at these four different ornaments hanging on a tree:

Four hanging Easy Christmas Crafts Spiral Beaded Christmas Ornaments

We like to purchase inexpensive beads found in quantity or by weight from discount or craft stores. Using a few zippered plastic bags, we separate the beads into colors and styles for future projects.

On our main Easy Christmas Crafts Spiral Beaded Christmas Ornament page, we show the materials and tools and each of the steps to make these pretty little ornaments.

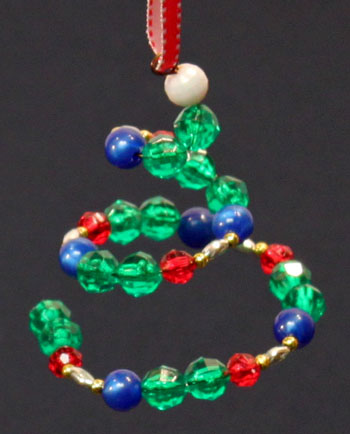
In particular, we describe, and show with pictures, the steps while making this pretty ornament:

Each of these can be made quickly and easily.

These pretty little decorations can be added to the Christmas tree or as an additional little remembrance on the outer wrapping of gifts. They would also add sparkle to place settings at dinner parties and be a small gift for guests to take with them.

With the variety in beads – colors, sizes and shapes – along with the variety in ribbons, many of these Easy Christmas Crafts Spiral Beaded Christmas Ornaments can be made quickly and  uniquely.

Have fun!


Highlighting the Lace Flower Ornament

Last week we showcased the Paper Doily Flower Ornament. Today, let’s take a look at a similar decoration made with lace – the Lace Flower Ornament.

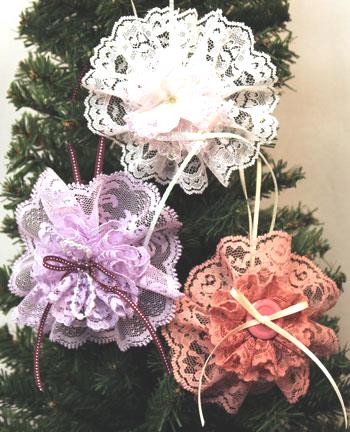
Here are three finished lace flower ornaments made with three different colors of lace:

Three completed Easy Christmas Crafts Lace Flower Ornaments hanging on a tree

Two short pieces of lace from 16 inches to 20 inches long – one roughly half the width of the other, two short pieces of narrow ribbon and an optional embellishment for the center of the flower are the main materials for this simple lace flower ornament.

Now, this ornament does require some simple sewing – very simple sewing – to make the circles of lace.

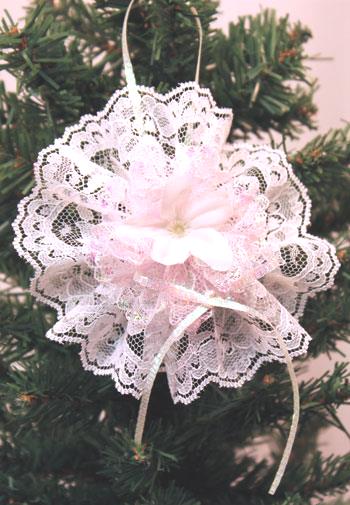
On our Easy Christmas Crafts Lace Flower Ornament page, we provide the step-by-step instructions along with pictures showing you how to make this pretty white and pale pink decoration:

Completed white and pink easy Christmas crafts lace flower ornament hanging on the tree

A few of these pretty decorations would add interest to a Christmas tree, a wrapped package or even hanging on a drawer pull. One or more would also make nice yet inexpensive gifts for several of the people on your list this year.

Take a look at the Easy Christmas Crafts Lace Flower Ornament page for the details.

Have Fun!

Angels, Angels Everywhere!

Hello everyone. Other projects took priority over adding new fun and easy crafts to www.funEZcrafts.com.

But, we’ve just added several new projects appropriate for the holidays or for anytime throughout the year.

Take a look at the multitude of angels:

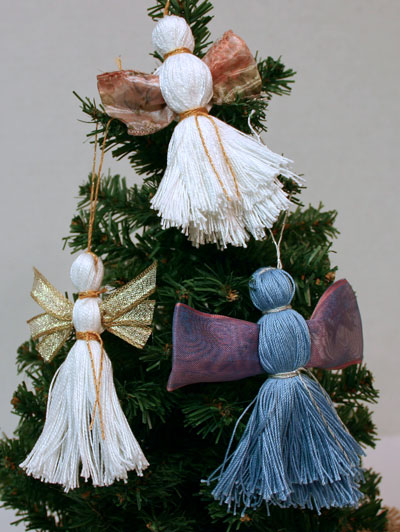
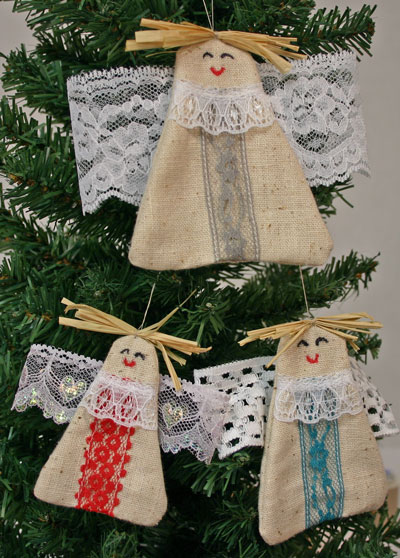
First in the list are the varieties of the yarn angel:

Three Yarn Angels

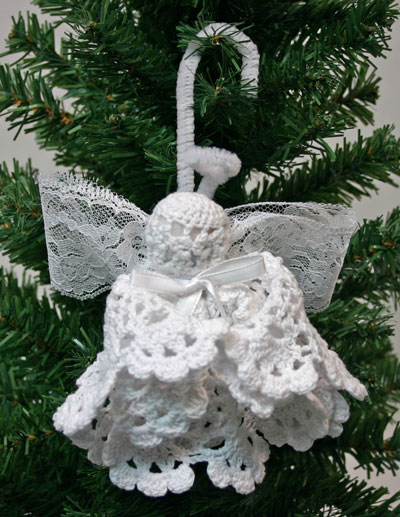
Second is the Doily Angel:

Doily Angel hanging on tree

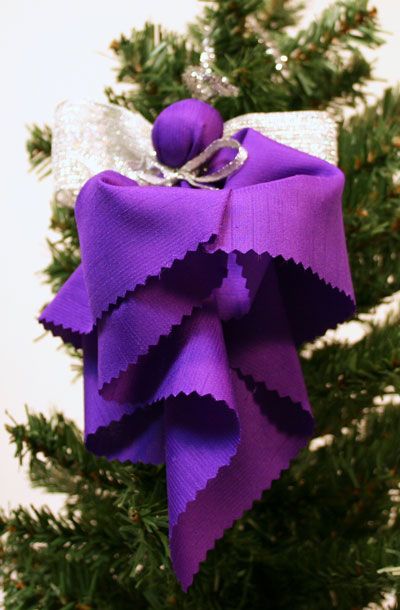
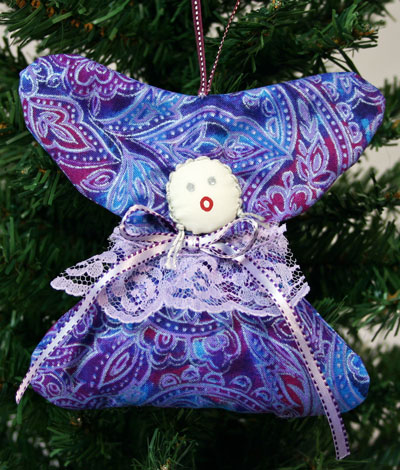
Next, is the Handkerchief Angel:

Purple Handkerchief Angel hanging on tree

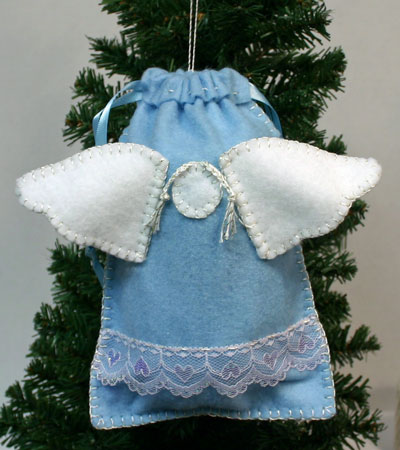
How about an Angel Gift Bag:

Angel Gift Bag hanging on tree

Here’s a Quilter’s Angel (though anyone can make this pretty angel):

Quilters Angel hanging on tree

One more, but this is a set of three angels for the Angel Trio:

Angel Trio hanging on tree

Each of these angels can be made with simple materials and tools and only take a small amount of time.

You can find links to all of these angels on our Easy Angel Crafts page.

Have fun making these angels to decorate your home, give as gifts or as group projects for children or adults to do.

Handkerchief Valet

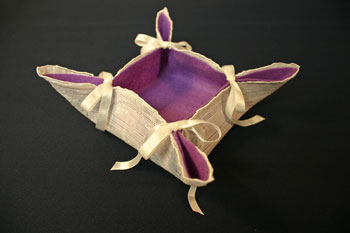
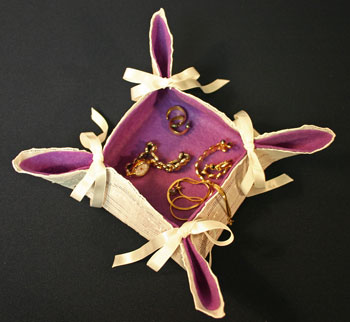
Take a look at this pretty valet tray made with a ladies’ handkerchief, a small piece of felt and ribbon.

Easy felt crafts handkerchief valet finished corner view

With simple materials and tools along with our easy instructions, you can make this pretty dresser tray for your daily jewelry or other treasures.

Easy felt crafts handkerchief valet finished top view with jewelry

Visit our main web page, funEZcraft’s Easy Felt Crafts – Handkerchief Valet, for the list of materials and how-to-make steps documented with pictures.

This lovely handkerchief valet makes a pretty addition to a dressing area. It also makes a beautiful keepsake gift for family members or friends.

Enjoy!

Vendor note: This charming, handmade handkerchief was found at The Packrat’s Daughter at the Lakewood 400 Antiques Market in Cumming GA. They can be found in the back of Hall G the 3rd weekend of every month.

Framed Doily

Do you have doilies that someone crocheted and shared with you but you don’t know what to do with them? Perhaps you think they’re pretty but you don’t want to use them as people used them in years past.

Your great grandma, your grandma or maybe even your mom used crocheted doilies as protection for the arms and backs of chairs and for placing under tchotchkes on end tables or coffee tables.

With today’s styles, what can you do with doilies?

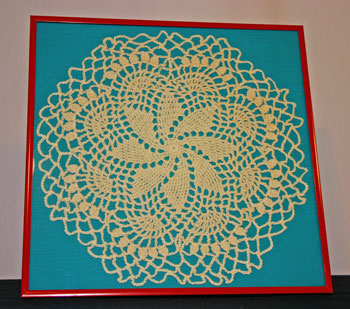
A framed doily makes a beautiful, interesting and warm decoration for your home. You can use a favorite color or a color that coordinates with your decor as a contrasting background within the frame. Or, if you have several, framed doilies make beautiful gifts too.

Take a look at this example:

Frugal fun crafts framed doily

This one happens to be a gift to the person (my sister-in-law, Kee) who gave me the doily. She didn’t use the doily and thought I could find a purpose for it. This framed doily version incorporates her favorite and second favorite colors, ocean blue-green and crimson red, to contrast and highlight the beauty of the doily.

This framed doily will make a pretty addition to her home.

You can find the simple, easy and fast instructions here:  Frugal Fun Crafts – Framed Doily.

Enjoy!

Doilies Offer Many Possibilities

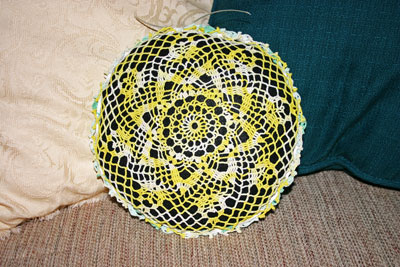
A doily pillow represents just one way to highlight the beauty of the delicate and intricate work of the crocheted stitches.

Take  a look at this pillow – one side shows multicolored green yarn and the other multicolored yellow yarn. Both sides highlight the artistry of the crocheted doilies:

Frugal-fun-crafts-doily-pillow-finished-green

Frugal-fun-crafts-doily-pillow-finished-yellow

Maybe you have a crocheter in your family and friends. Or, perhaps you purchased some doilies for their beauty then didn’t know what to do with them.

This easy-to-do doily pillow adds a beautiful accent to a group of pillows on a bed, a window seat or anywhere a soft pillow works in your decor.

Plus, the look varies by the choice of pillow fabric – light or dark, matching or contrasting – and the type of ribbon you use to weave the doilies together.

With just a few inexpensive tools and materials and a short amount of time, you can make a pillow today. And, when you want a different look, you can easily change the fabric and ribbon to make another pillow with the same doilies.

Take a look at the how to steps on our web site:  funEZcrafts Doily Pillow.

Have fun!

Easy Felt Crafts – Wine Gift Bag

The holidays arrive soon. If you give hostess gifts, perhaps a bottle of wine is on your list.

We just added a simple yet pretty wine gift bag to our Easy Felt Crafts.

Quite a few of us do not like to drink wine, however we do enjoy cooking with wine. The sauces taste great and not anything like the wine itself. In these days when we need to be more economical, perhaps your hostess gift can be a good cooking wine, not necessarily a wine connoisseur’s drinking wine.

The bottle used in our example is a nice marsala that makes a great sauce for either beef or chicken.

Here’s a recipe that we enjoy. Try it. If you like it, the recipe can be part of your hostess gift – a nice but not expensive bottle of Marsala wine in a pretty wine gift bag with the addition of a easy but good recipe – compliments of funEZcrafts!

funEZcrafts’ Beef or Chicken in Marsala Wine Sauce

Shopping list:
 
>>Beef chunks (not stew beef – too gristly and tough – chuck is good) or two or three chicken breast halves
>>Marsala wine
>>Butter
>>Extra virgin olive oil
>>Package of baby bella mushroom slices (can leave this out if you don’t like mushrooms)
>>Heavy whipping cream (small container is fine)
>>Dried, minced onion
>>Salt
>>Pepper
 
Cut the meat into one inch cubes
 
Put a large, non-stick skillet on the stove on medium-high heat
Put two tablespoons of butter and one tablespoon of olive oil in the skillet
Put the meat into the skillet, spreading it across the bottom of the pan for even cooking
Let the meat cook for 3-5 minutes, stirring it a couple of times
If the pan is dry, add another tablespoon of butter and another tablespoon of olive oil
Add the mushrooms to the pan with the meat
Add a teaspoon of the dry, minced onion
Sprinkle salt and pepper over the mixture (a half teaspoon of salt and a quarter teaspoon of pepper)
Stir the mixture, allowing the mushrooms to absorb the butter and oil
Add one half cup of Marsala wine to the pan, stir briefly
Allow the wine to reduce by half (monitor your heat, you want the wine to bubble and evaporate but you don’t want the contents of the pan to burn)
Add one third cup of the heavy whipping cream, stir briefly to mix
Allow the liquid to reduce again (you’re looking for a thick sauce, almost as thick as gravy but not quite)
 
Remove from heat and place in serving dish.
Serves 4 to 6 people.
This is an easy week night recipe.
Enjoy!